Custom Guitar Hero World Tour controller for electronic drums
Custom Guitar Hero World Tour controller for electronic drums
Published byvirtualflesh on 2010-01-24 Category: Controller | Page Views: 8017
Credit goes to forahobby for inspiration on this controller mod, and for doing the dirty work on verifying that a controller mod works flawlessly with Guitar Hero. This mod confirms it. Check out the Ultimate ION Drum Rocker J5/J6 Mod for Xbox 360 for a mod of the same controller.
After this modification you will be able to play Guitar Hero with electronic drum inputs using 1/2 male mono plugs, using the full 5 lanes including orange and any bass configuration except the Ion Drum Rocker pedal which uses a switch.
Additionally, this modification allows direct analog-electric signals to be sent to the Xbox 360 drum controller without going through a digital/MIDI interface or computer. Similar to forahobby, I've confirmed this modification works with the Ion Drum Rocker. I have NOT attempted using a different electronic drum kit.
This controller mod tutorial is intermediate level due to the use of power tools, tighter specifications on form factor, and modification of the kick/midi PCB to support full 1/2 plug bass plug input.
This modification is not reversible. The stock Guitar Hero drum case is disassembled and cut, rendering the original case unstable for use in the game.
Read through the entire tutorial first. There is no quiz at the end, but there is a bunch of info and some gotcha's that may help your overall approach. Total time it took to complete this was about 8 hours. Total cost minus tools was $54 plus tax.
Start by ordering a spare Xbox 360 drum controller kit from eBay (or use the one you have if you don't plan on ever using it again). I picked up a spare for $40 in Jan 2010, including shipping and handling.
While you are waiting for your spare drum controller to arrive, get a few parts from your local electronics shack:
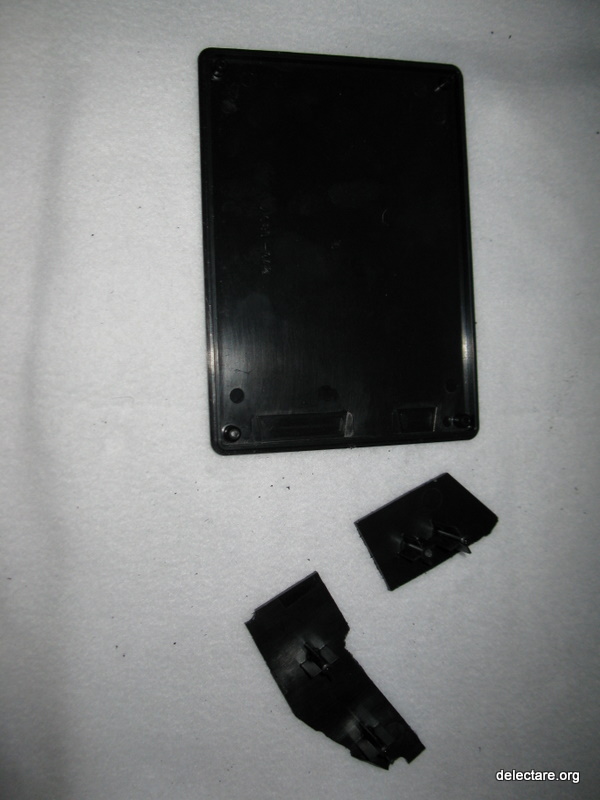
$6 black plastic project box (7x5x3)
$3e x 3 2-pack (total of $9 for 6) 1/2
open-circuit female mono plug jacks
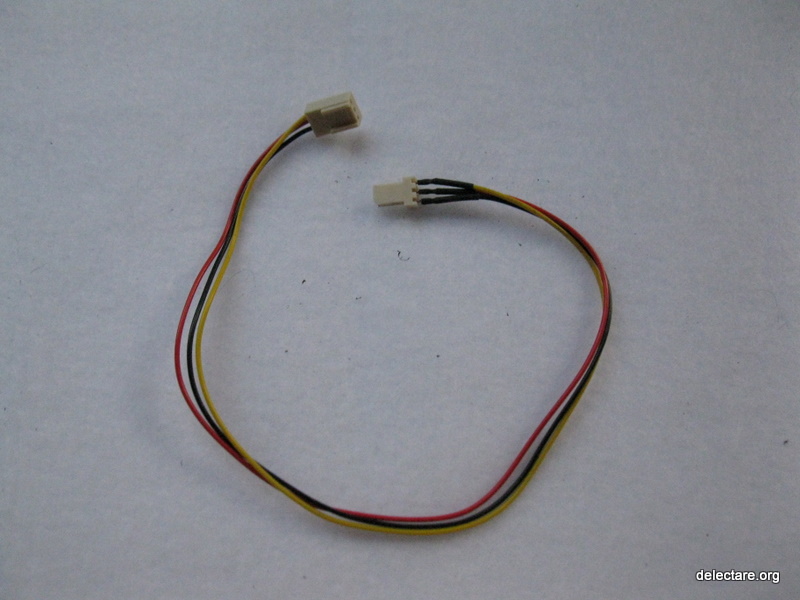
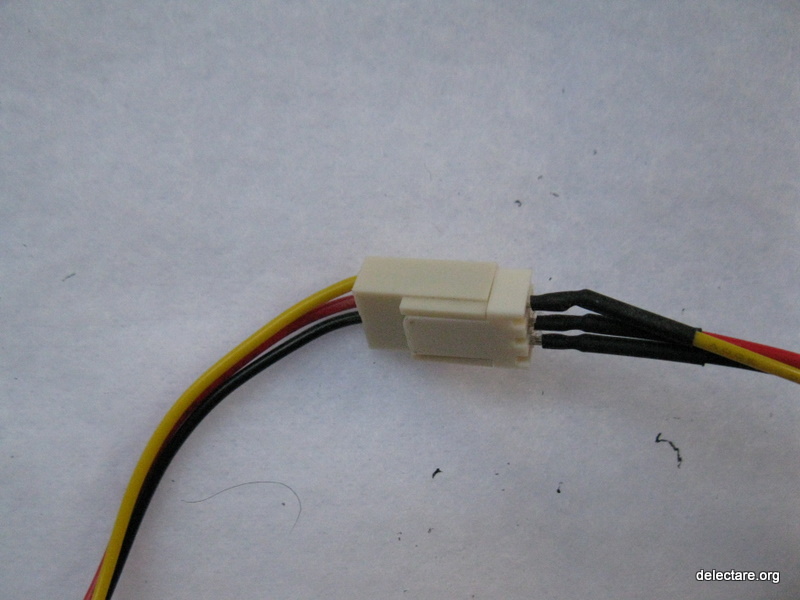
2-wire quick connect cable (unless you have a spare) (12 is recommended)
Or... spare parts from a computer cable box:
2 or 3-wire quick connect cable (12 is recommended)
Tools needed:
Jigsaw with plastic cutting jig (this tool will scuff plastic if placed directly on it)
Drill for 6 mono plugs (choose bit size to match the mono plugs purchased)
Wire cutter/stripper
Soldering iron and solder
Superglue
Clamps
Some skills - you'll find that I have just enough to get into trouble and appease my inner-tinkerer
Procedure
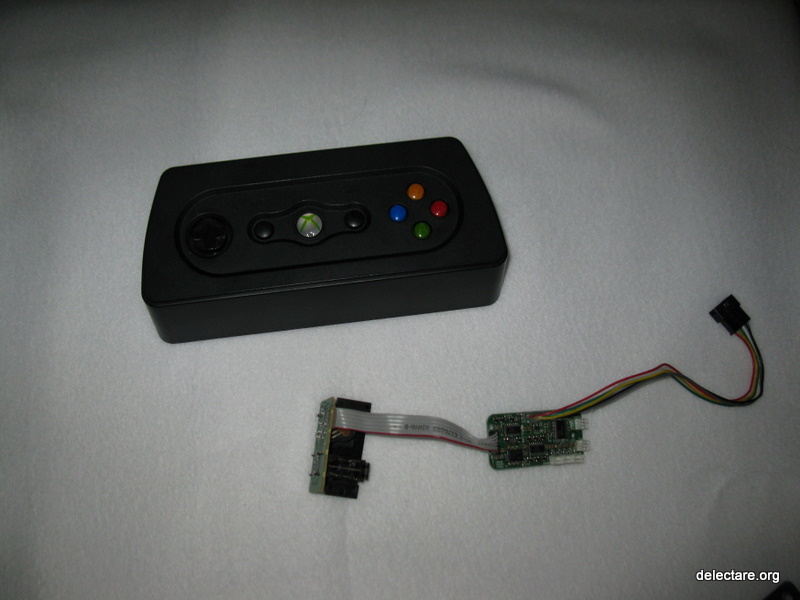
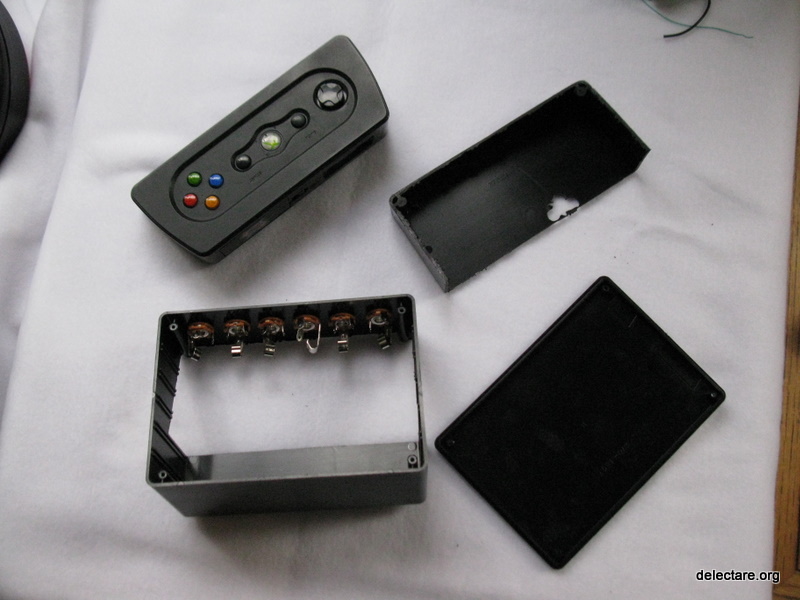
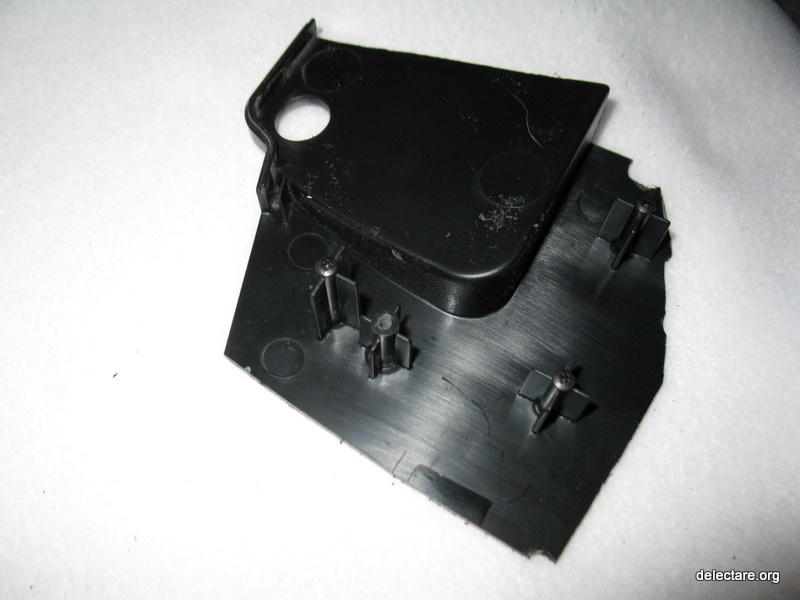
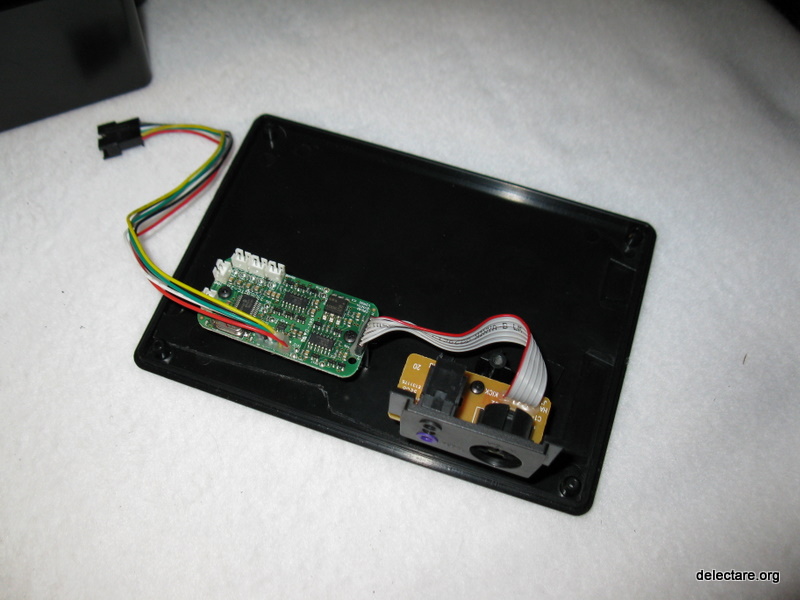
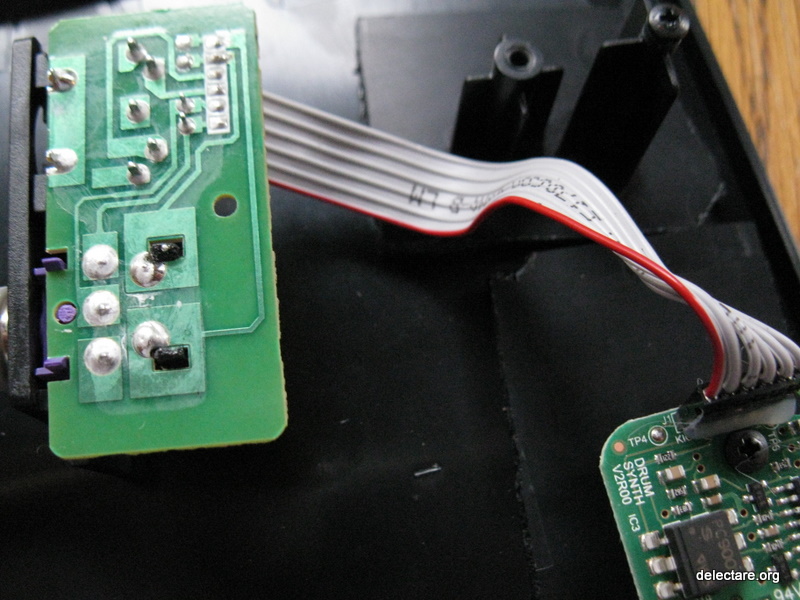
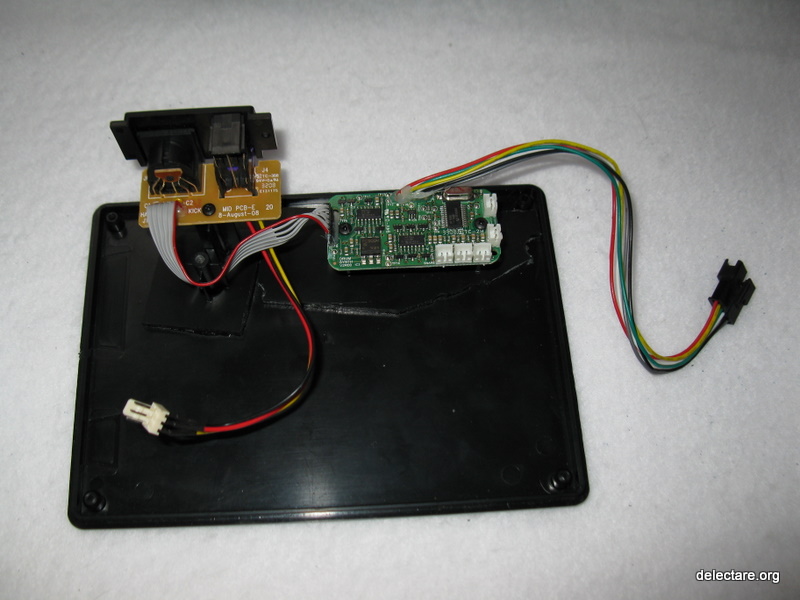
Start with dis-assembly of the drum controller. Take out all the screws from the back of the drum case. Careful with the controller when taking out the 3 screws holding it in. Set the controller to the side. Disconnect all the drum inputs from their PCB. Remove both PCBs and set to the side in a static-free container keep the screws for remounting later.
Leave the drum connection wires in the drum case until after you've decided on your final project box form factor and have the physical box constructed. Check the figures for what the controller and PCBs look like once disconnected.
Figure out where you want everything inside the box. This took the most time for me. Without having to purchase extra material to account for mistakes, take measurements and calculate volumes to get estimates on how things will fit together. Account for electrical isolation, vibration, accessibility, do some trial-and-error on wire routing, and have tons of atience. Before proceeding, you should have the final form factor figured out.
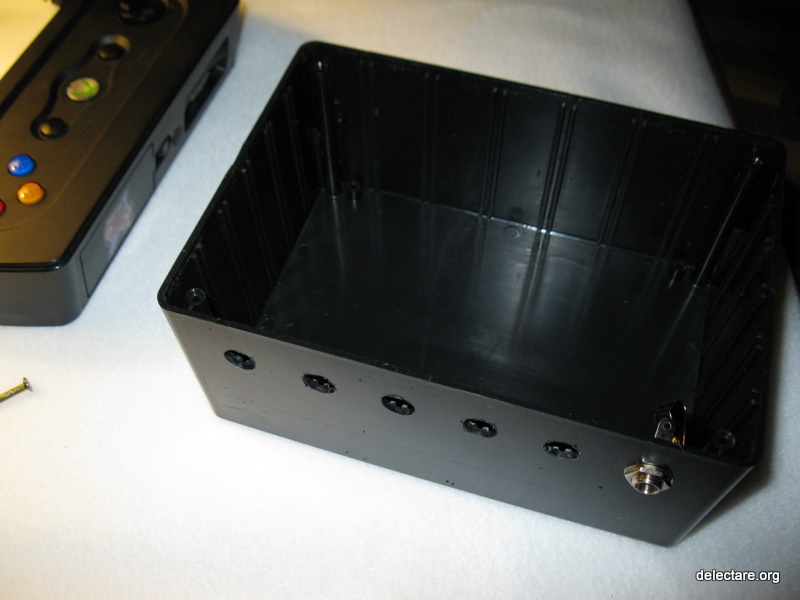
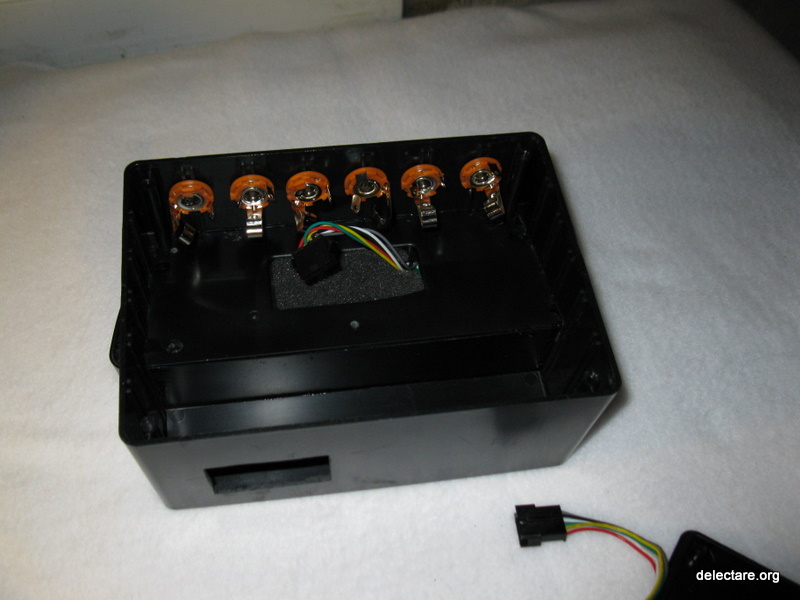
Drill holes in the project box for the 6 mono plug jacks. Test the holes to make sure they work. No sense in moving to the next step if the jacks don't fit, or something when wrong and the jack terminals touch each other and short-circuit. I took the jacks in and out of the box 2 or 3 times to test cuts and fit parts.
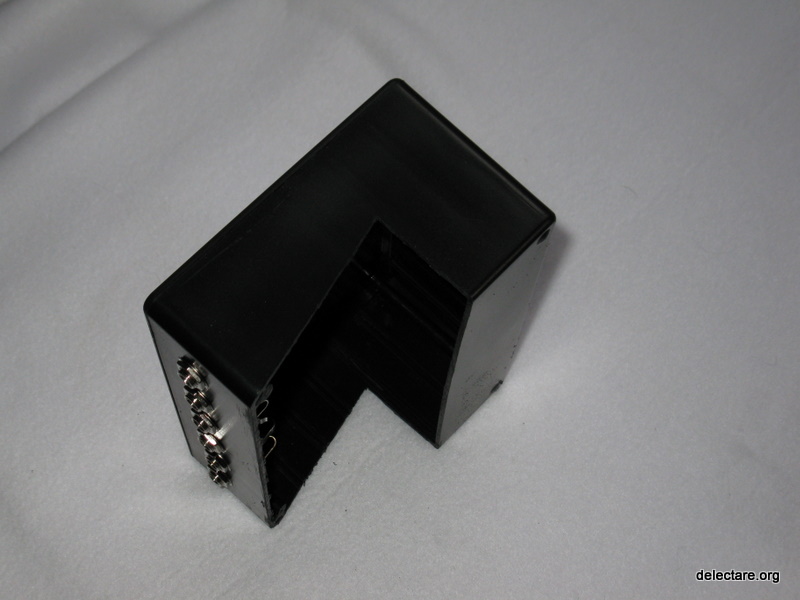
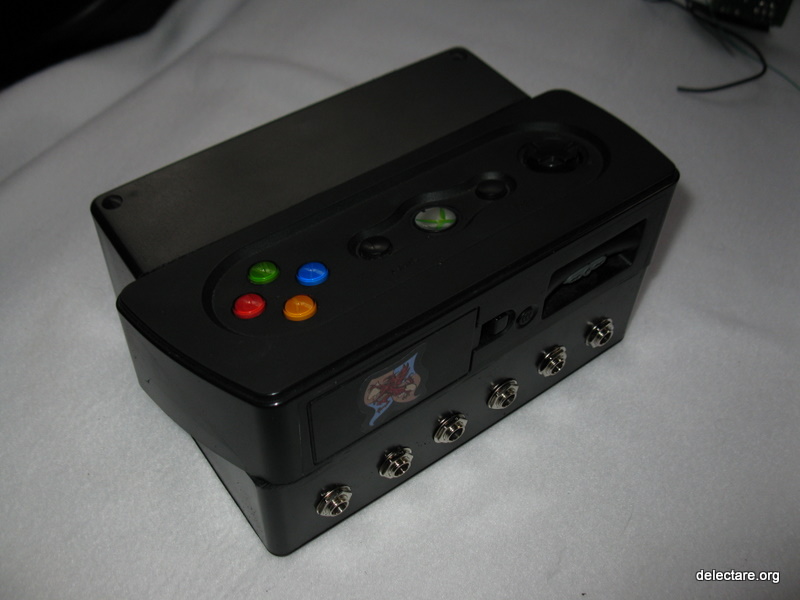
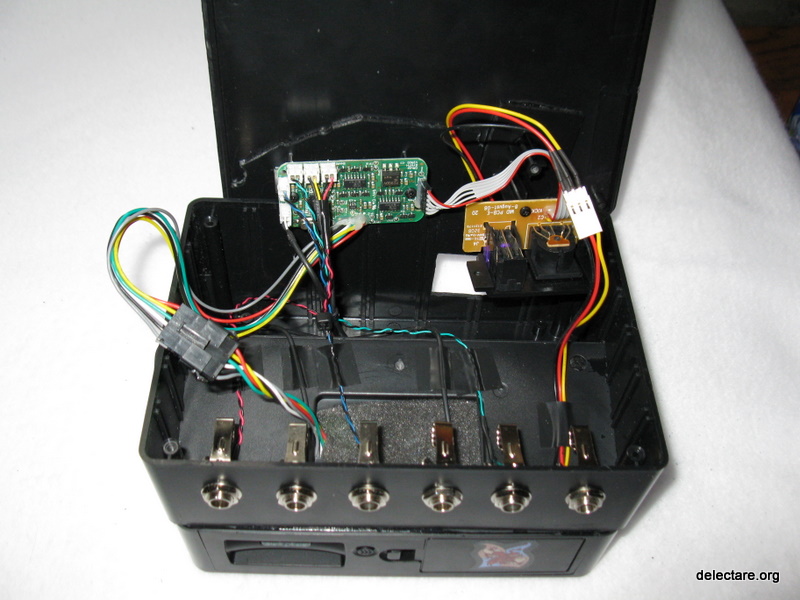
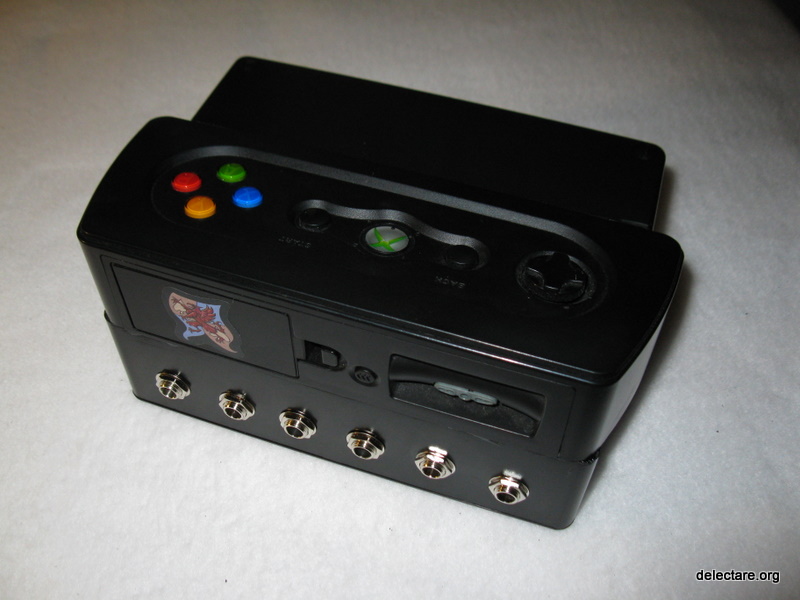
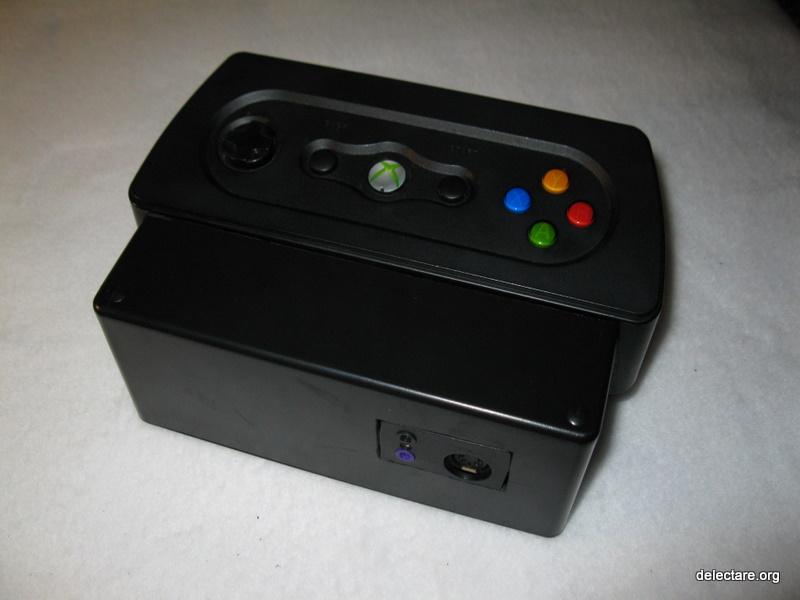
Cut the project box to fit the controller using the drill and jig saw, providing access for the PCB connector to the inside of the box. Leave room for the mono plug jacks and the PCBs. Cut it as you wish. My interests lie more inside the box than outside how it works versus how it looks. But in this case I wanted something that could be mounted to the electronic drum frame, so I was going for as small as my giant fingers would allow and semi-cool so that it blends in with the drum kit. I purchased 7 different sized boxes from the shack, chose the one that fit my purposes, and returned the others for a full refund. Check the figures for my cuts. Put parts into place to check your final form factor.
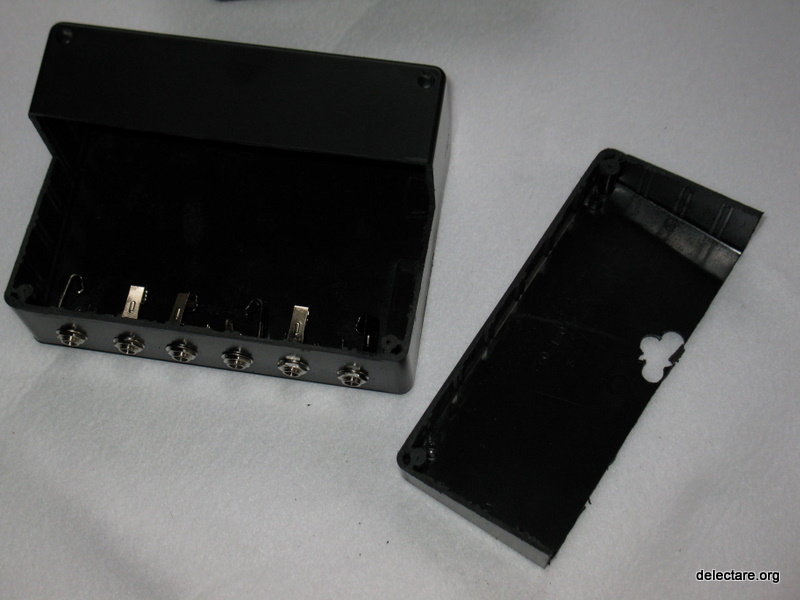
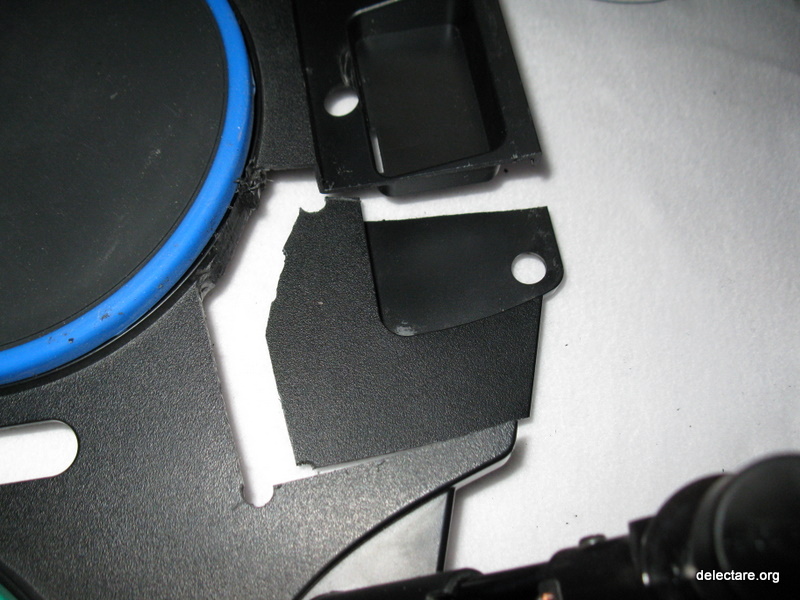
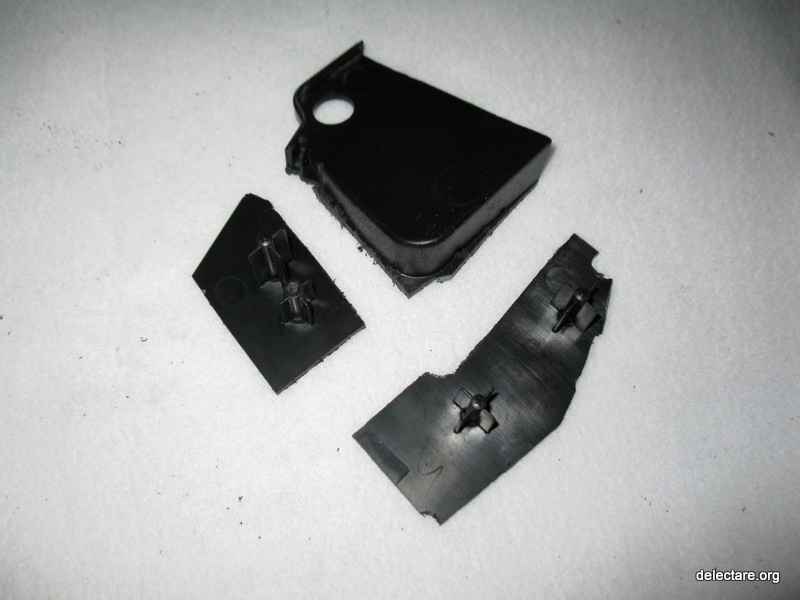
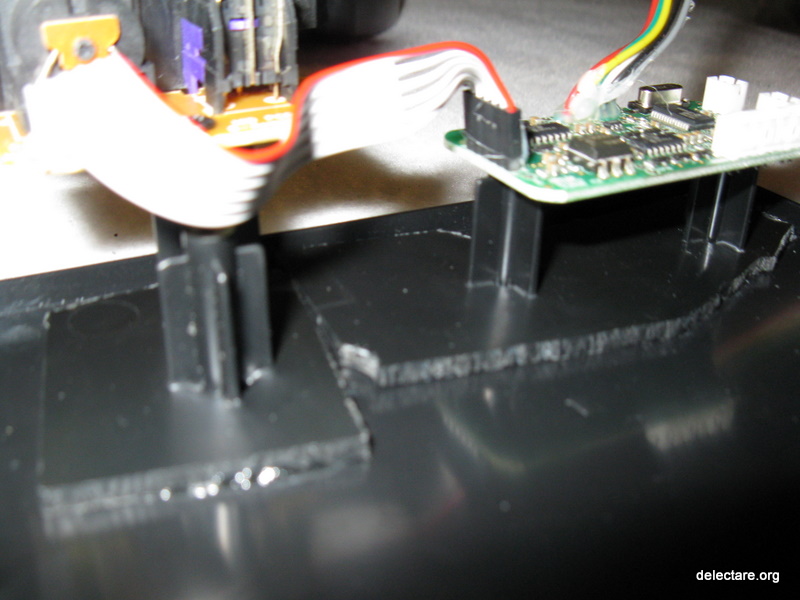
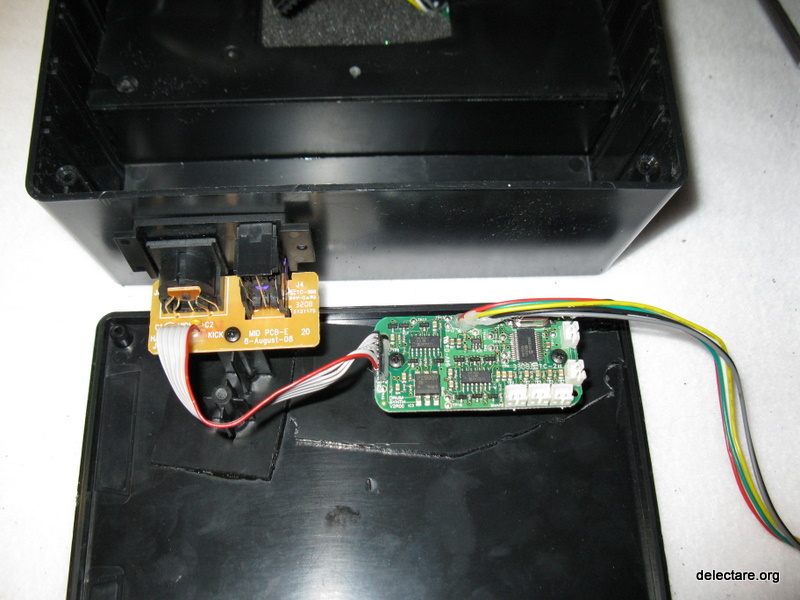
Cut out the portion of the stock drum case with the molded PCB mounting posts. Cut them individually to match your desired design. I cut them out and superglued them (Don't superglue yet!) to the inside of the project box access panel so that the PCBs had a convenient place to mount. Check the figures. NOTE: the kick/midi PCB in this modification was turned upside down versus how it was mounted to its post in the stock drum case. This was done so that it would fit inside the box I purchased, but some mechanical strength was sacrificed as a result of this mounting configuration. If you are going to mount the PCB in the same fashion, be prepared to accept fatigue failure of this mounting post sooner than it would fail if it was in the stock drum case. Or, reinforce it. I decided to leave it and accept earlier fatigue failure so that I could easily open the access panel.
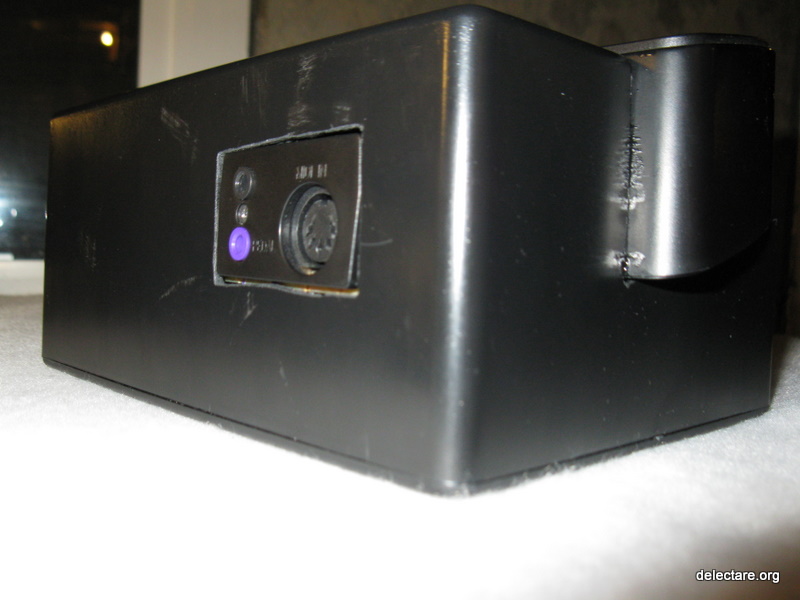
Cut a hole in the project box with the drill and jig saw for the midi/kick interface. Check the figures. This interface is required for drum sensitivity tuning, so make sure your design provides access to it during playtime. The figures here are for example only. GOTCHA: When you start trying to measure where something on the inside of a box needs a hole to see out, you have to flip your visual thinking around so that you don't end up making a hole in the wrong place. For example, the hole for this interface was marked from 2 different edges a) the vertical edge of the box to find the hole's distance from that vertical edge, and b) the edge of the access panel to find the hole's distance from the horizontal edge. Experiment with some paper to get it right.
Superglue the controller to the box. Superglue the PCB mounting posts to the project box access panel. Clamp and set for 15 minutes. Your mileage may vary. After the glue dries, double-check that it all still fits together.
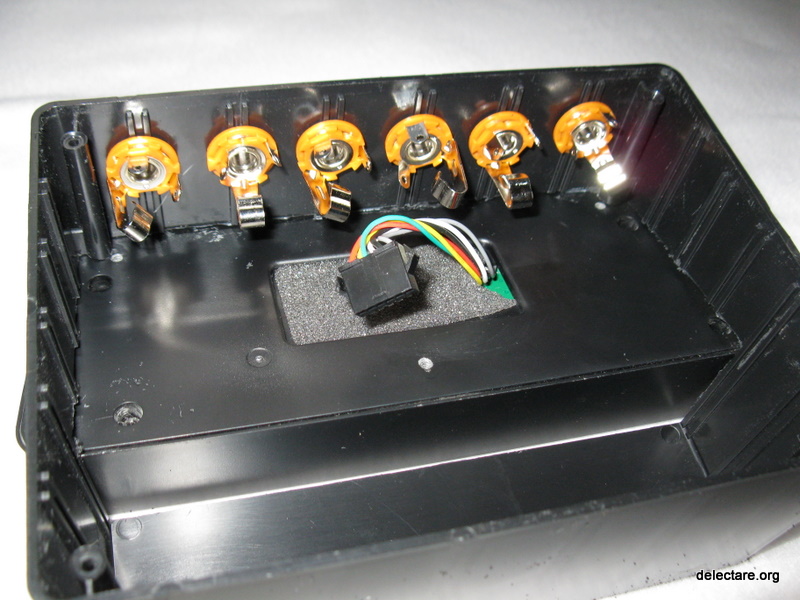
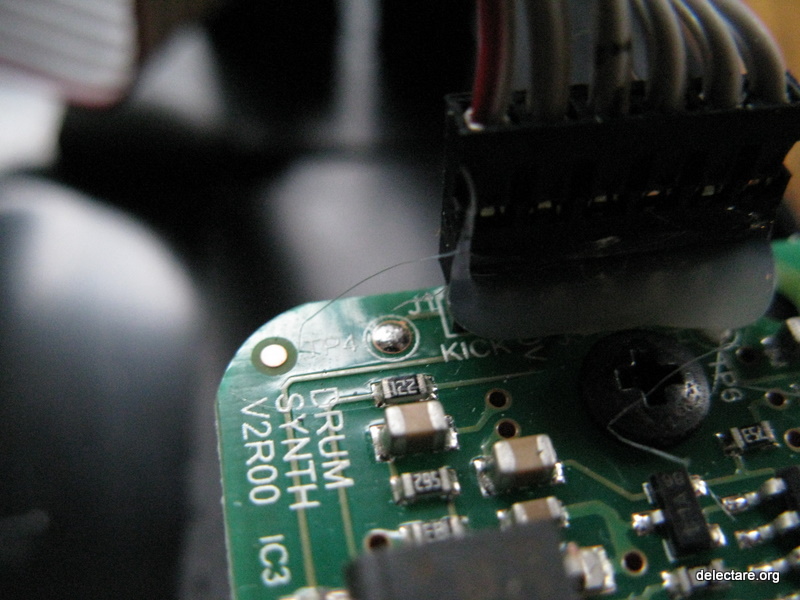
Time to start wiring. Start with the bass plug jack wire. Cut the purchased or spare quick-connect wire in half. Strip and tin each pair. There are two ends to solder. One end is soldered to the kick/midi PCB. The other is soldered to the plug jack. For any size plug, common (ground) is the larger part of the plug (not the tip). Hot is the tip of the plug. This is important to maintain designed polarity in the circuitry. Solder the black wire from the female end of the quick connect wire to common on the bass plug jack. Then solder the other wire to hot. Now refer to the figures showing the kick/midi PCB. The purple kick pedal plug wires are simply soldered to the kick/midi PCB, and pass through directly to the main drum synth PCB at the left edge of the its quick connect. Where the purple jack is soldered to the kick/midi PCB provides a convenient location to solder the male end of the spare quick-connect wire. NOTE: the purple plug is a stereo jack, but the second channel dead-ends on the kick/midi PCB on the right of the 3 solder points. Hot is left and common is center. Choose which ones you want to solder based on your desired use. I finally chose to connect black to common (center) and red to hot (left). GOTCHA: I made a mistake and originally soldered the black wire to the second stereo channel thinking it was electrically connected to common. This is true only if a mono-plug is installed in the jack, thus short-circuiting common and the second channel. Once the plug was removed they were no longer connected. So I had to remove the common from the second channel (over-melting the solder and creating a hole) and reattach it to the center solder point.
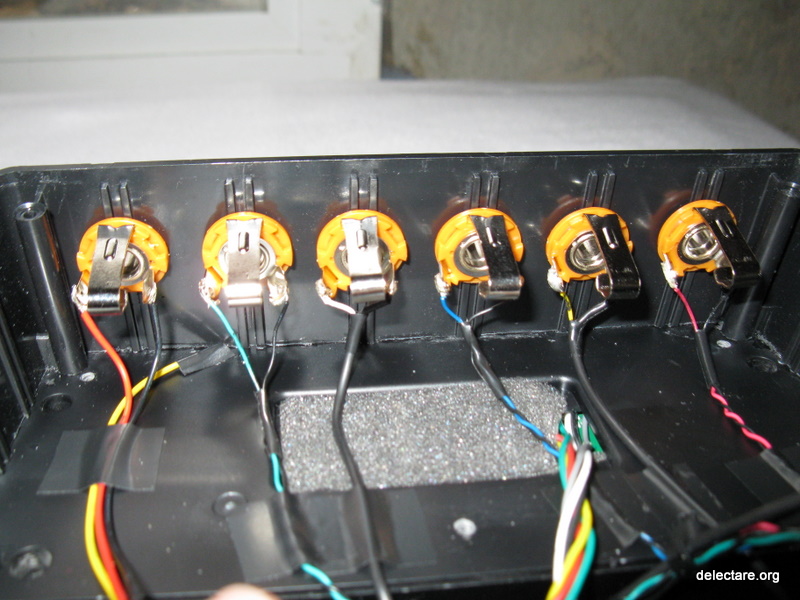
Cut the wires from the original stock drum case. This step was left until now to allow the final form factor to be constructed. Cut enough length from the wires so that, when soldered to the plug jacks, the wires can be routed and attached to the PCB mounted on the access panel while the access panel is open. Strip, tin, and solder the drum and cymbal wires cut from the original stock drum case to the other 5 plug jacks. Route and tape wire to avoid tying up the PCBs when the box is opened and closed. Check the figures for how I did this.
Fasten the access panel.
Attach drum frame mounting hardware (TBR).
Plug in and tune using the drum tuning kit.
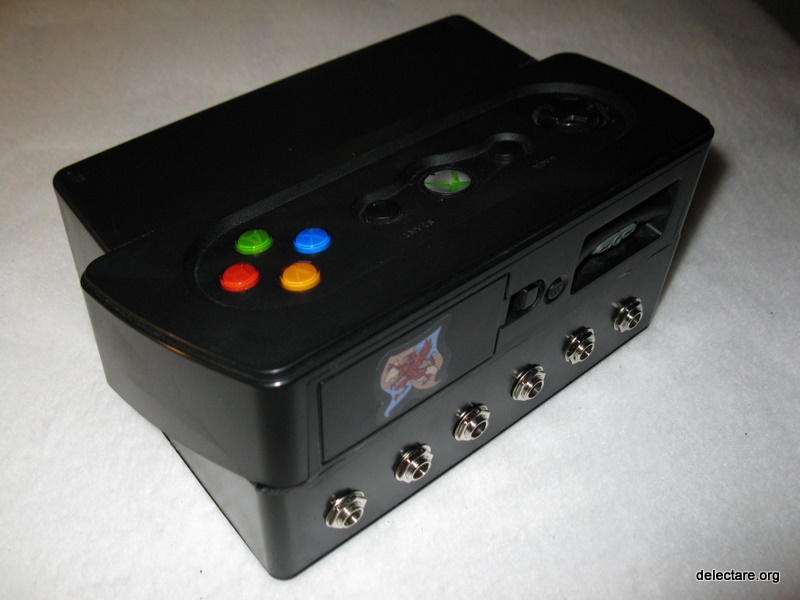
Walk around and admire your new creation, take pictures, and post to the web.