Disassembling the Internals of the Xbox 360
Published by Anand Lal Shimpi, on 2005-11-18
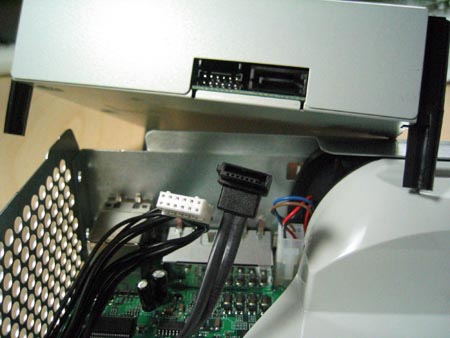
To continue further, you will need to first remove the DVD drive. Simply hold the drive and lift up. You will notice that the Xbox 360's DVD drive uses a Serial ATA interface which keeps things very tidy compared to the original Xbox. At this point, remove both the power supply cable and Serial ATA cable from the DVD drive and then from the motherboard.
Click to Enlarge
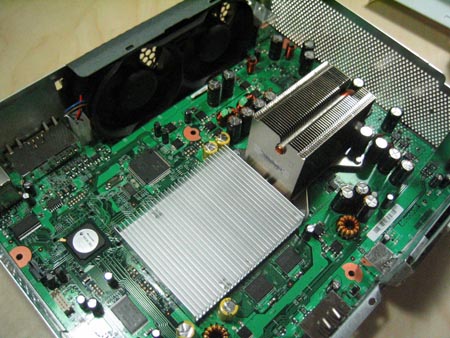
The fan shroud can now be removed by simply twisting the cover until it pops off. The shroud is held in place by one clamp that attaches to the actual fans. Just be careful at this point not to break the clamp.
Click to Enlarge
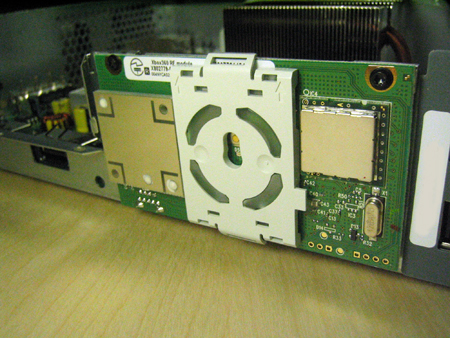
Next, remove the RF unit at the front of the Xbox 360 by removing the small black torx screws using a T6 screwdriver. Then you must remove the plastic cover on the front of the RF unit by unlatching the top and bottom of the plastic cover. Once you have done this, you will reveal the third screw holding the RF unit to the chassis. Remove the last screw and pull out the RF unit. Lastly, remove the power connections for the fans. You can now lift the motherboard out of the metal chassis.

Click to Enlarge
As a reminder, the Xbox 360 is a delicate equipment and must be treated with care at all times. Ensure that you frequently ground yourself to discharge any build up static which can severely harm your Xbox 360.
Related Link: AnandTech: Dissasembling the 360 Internals
|
|