 How To Illuminate Your Text in Photoshop
Published by ilovegraphics on 2012-05-05
If your design needs a bright and shiny title, this special Adobe Photoshop tutorial is for you. This tutorial will illustrate how you can convert simple colored text titles into bright and shiny text that gives that extra visibility to any design. Simply follow all the instructions below and you will learn how easy it is to achieve this using Adobe Photoshop.
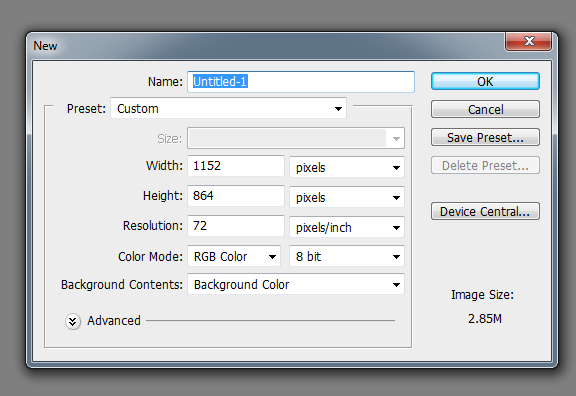
1. You will need of course to setup your document correctly first. Whilst you can set your width and height as you see fit, make sure that you set the resolution to a high value of 300ppi. This will help ensure a high quality color printing for your text style. Just set this up by pressing CTRL+N in Photoshop.
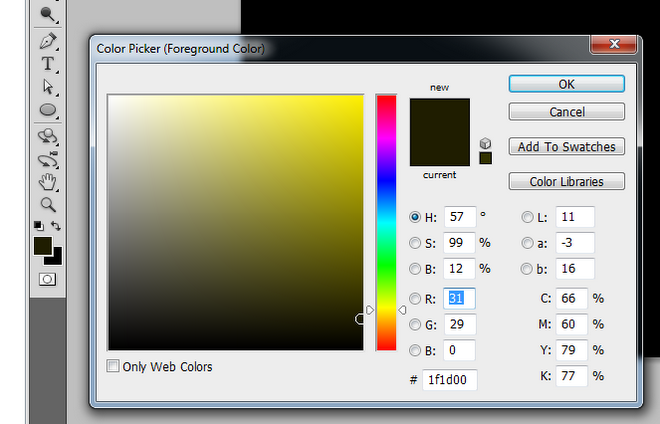
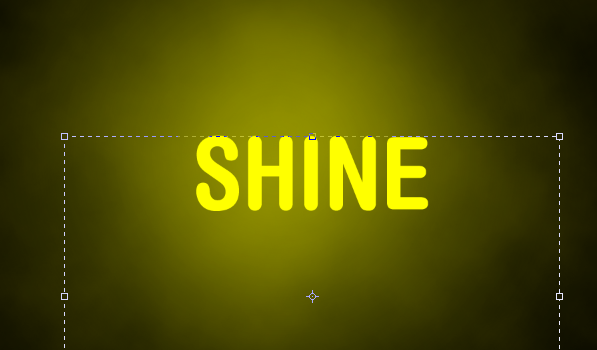
2. The next step is to create a good background for our bright and shining text. TO emphasize the bright effect of course, we will use a dark background. So first fill up your text with a black background. Then setup your foreground color as a dark yellow and then the background as black.
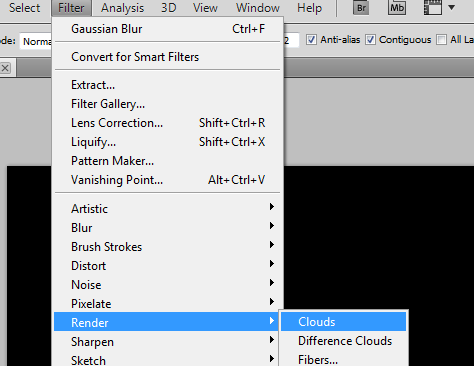
3. Then, click on Filter -> Render -> Clouds. This should get you a nice dynamic background for our text.
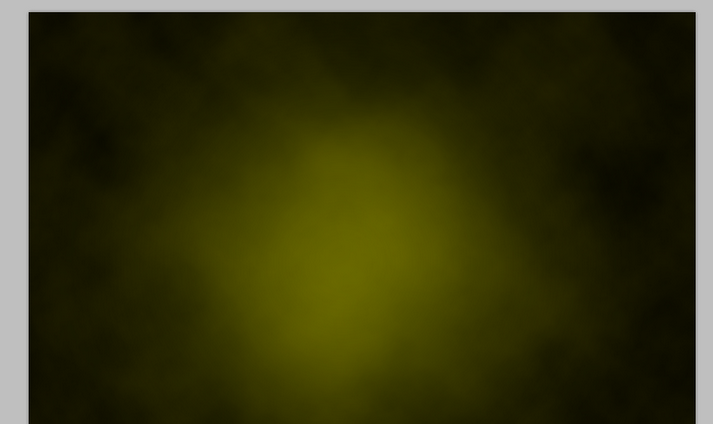
4. Before we are finished with the background though, create a new layer by pressing CTRL+SHIFT+N. Then using a large soft round brush, paint a big yellow spot at the center of our background. Reduce this new layer’s opacity to 55% to get a nice brighter effect in the center.
5. Now, we are ready for our text. Simply use the text type tool an type in your text. Just use the font style of your choice.
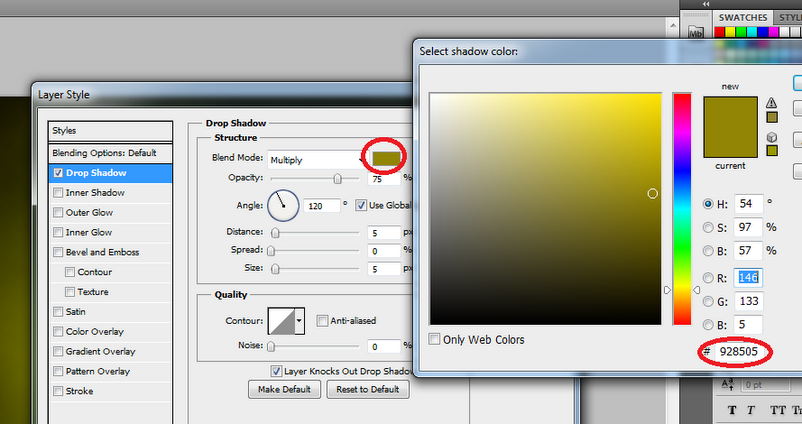
6. Now we will use some layer style options to make our text look brighter. Just double click on the text layer to get into the layer styles window. Then just click first on drop shadow and change the color of the shadow to #928505
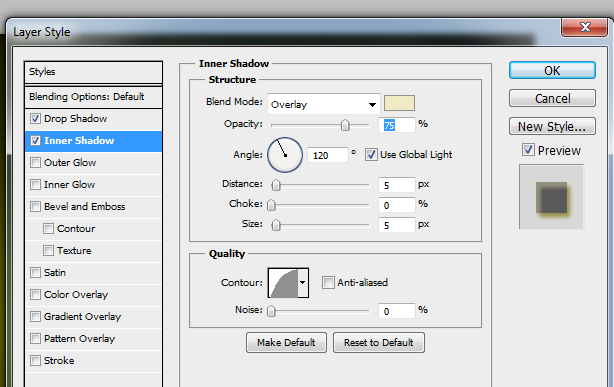
7. Then, click on Inner Shadow and use these settings:
a. Blend Mode: Overlay, Color: f0ebc5
b. Contour: Half Round
c. Rest to default
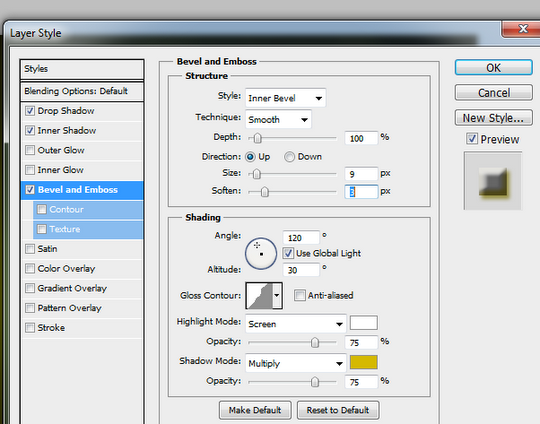
8. Next, choose bevel and emboss. Use the following settings:
a. Size: 9
b. Soften: 3
c. Close Contour: Notched Slope Rounded
d. Shadow Mode: Multiply, 75%, #d5b900
e. The test should be default
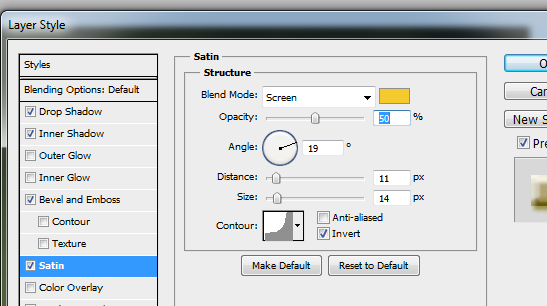
9. Next, select the satin layer options. Use a color of #f5ca2d, and change the Blend mode to screen. Set the Contour as well to cove deep.
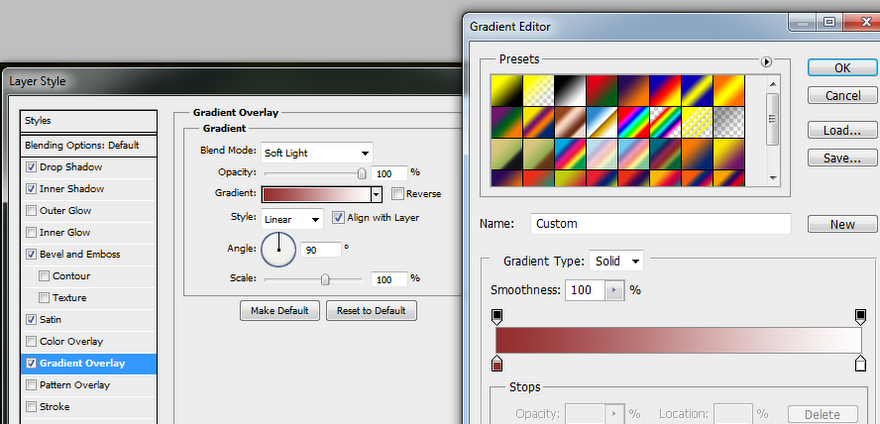
10. Also, tick on the gradient overlay and apply these options:
a. Blend Mode: Soft Light
b. Gradient Color: # 952e2f to White #ffffff
11. Afterwards, we should have a pretty slick bright looking text. Looking good huh? Hold on tiger, we’re not done yet.

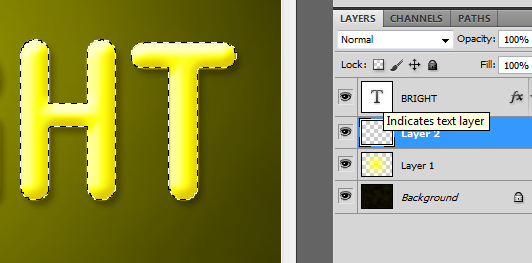
12. Now we shall add some great looking shines. First create a new layer by pressing CTRL+SHIFT+N. Name it any name you want, just make sure that you place this layer BEHIND your text. Now, hold down the CTRL key and click the image thumbnail of your text layer, this lets you create the shape and area of your text.
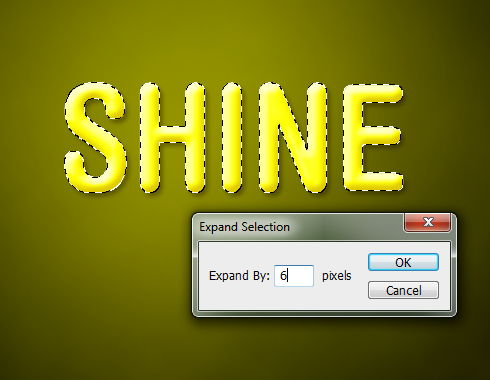
13. Then, expand the selected layer by 6 pixels. DO this by going to Select -> Modify -> Expand. In the window that opens use a 6 pixel value of course. Then fill the layer with this color (#f0ebc5 )using the paint bucket tool.
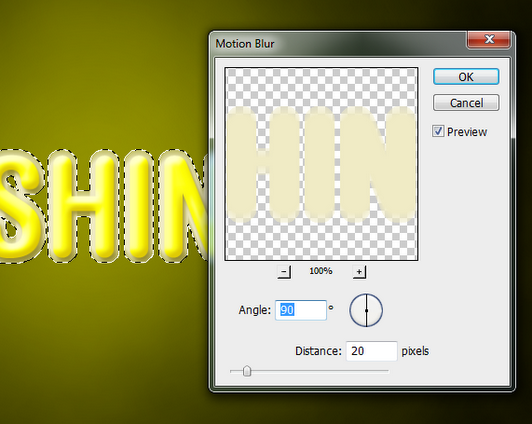
14. Then, apply a motion blur. Go to Filter -> Blur -> Motion Blur. Use 90 degrees for the angle, and 20 for the distance.
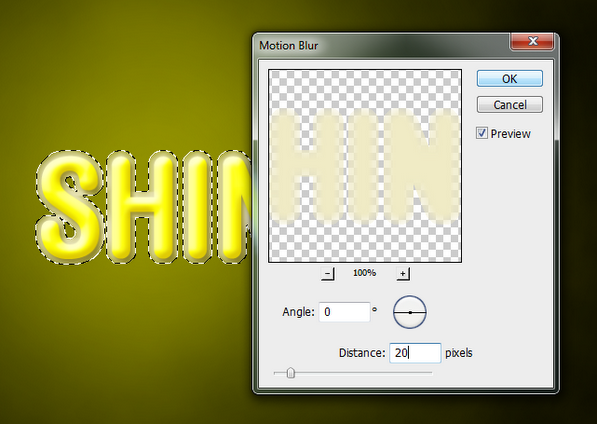
15. Next, apply the motion blur again just like above. However, change your angle value to 0 and press ok again.
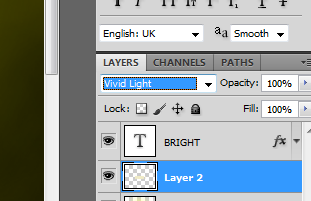
16. Then, just change the blend mode of your layer to Vivid light to effectively display our shining text.
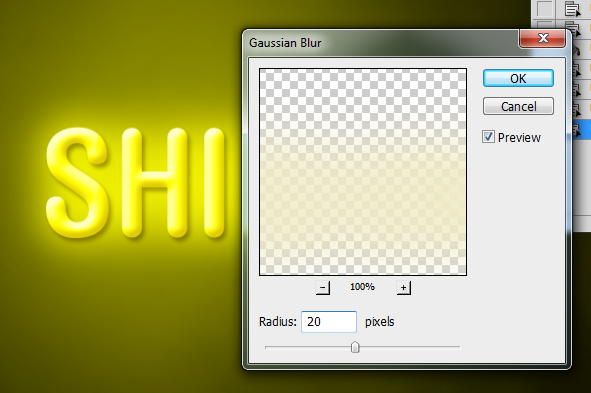
17. Finally, just go to Filter -> Blur -> Gaussian Blur and use a 12 radius value to this effect.
18. Once done, you should have a nice bright looking title text.

19. Finally, we add in some extra text to make this into a real poster.

Great! Now you know how to create some bright and shining text.
Related Link: How To Illuminate Your Text in Photoshop
|
|