 Create a scissor icon in Photoshop
Published by ilovegraphics on 2012-05-05
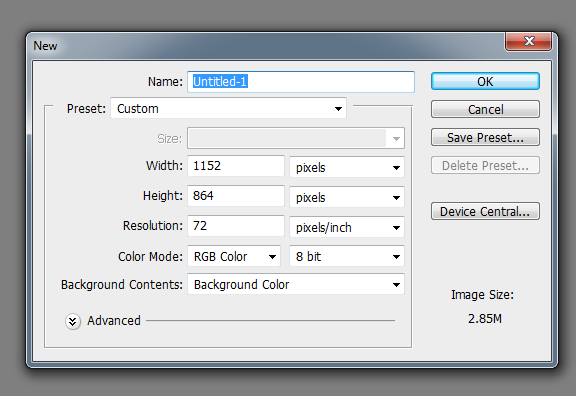
If for whatever reason you need to have a scissor vector or icon on your design, then you’ve hit the jackpot for this is exactly the tutorial you need. We will show you the important steps that you need to do to create a convincing looking scissor graphic using Adobe Photoshop.
1. With your new document in Photoshop, use the PEN TOOL to create the shape below as a PATH. You only need to use 4 anchor points here, and you should just adjust the anchor handles to get the line curves/bends that you need.
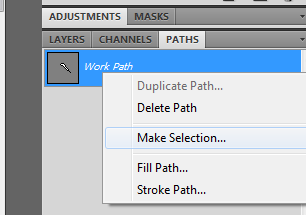
2. Now, go to the paths panel, and right click on the current work path. Select the option to “make selection”.
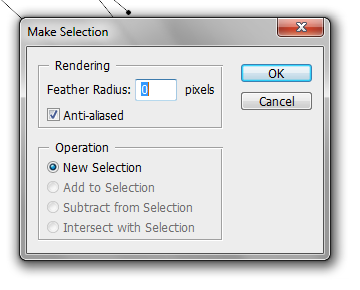
3. In the window that opens, render your new path with 0 pixel feather radius. Use Anti-Aliasing and of course pick new selection as the operation. Press ok once done.
4. With the new selection, use the paint bucket tool to color the shape with a light-grey/light blue color. You can use the color picker for the foreground color to be more specific. Enter something like “e5eaef” in the hex color code field (# field) as a start.

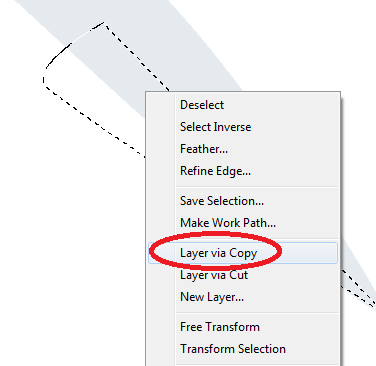
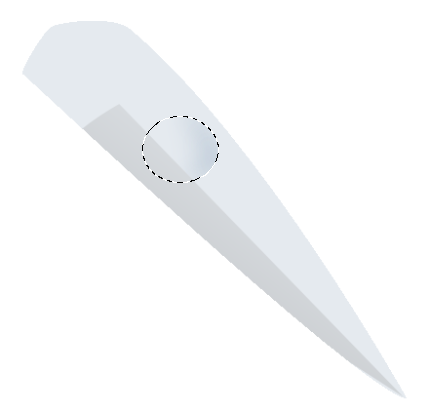
5. Now, select an area of the scissor like the one below. This will be the divider where both sides of the sharp edge of the scissors meet. Use the polygonal lasso tool, or even the pen tool to make this selection. Once done, right click on it and select the option to “layer via copy”. This helps us manipulate this side of the scissor.
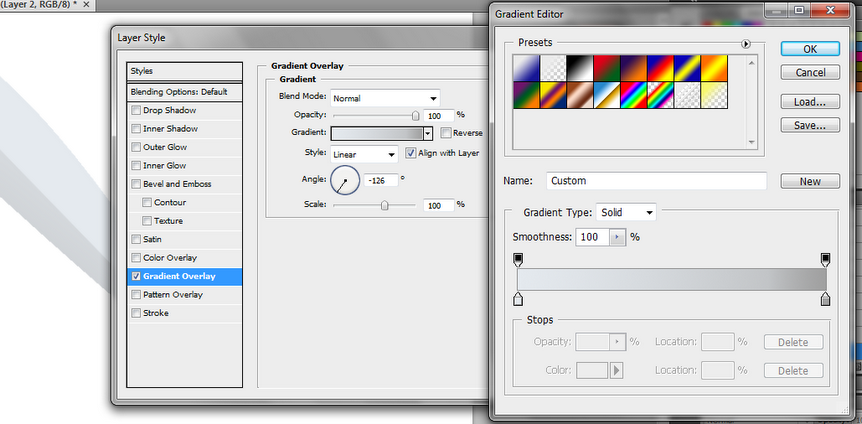
6. Now, with the new layer selected, go to its blending options by double clicking on the layer. Add a gradient overlay by ticking on its checkbox. Use these values:
a. Blend Mode: Normal
b. Opacity: 100
c. Gradient Color: #e5eaef to #a1a1a1
d. Style: Linear
e. Angle: -126°
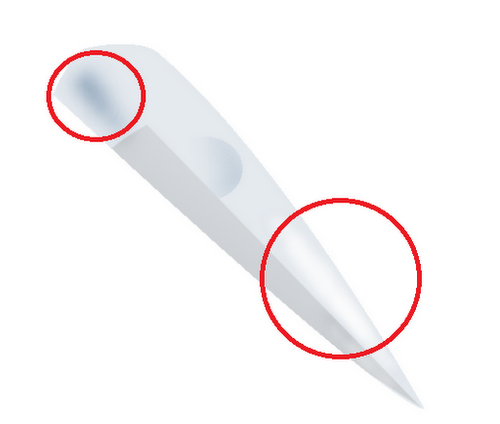
7. Next, select the bottom original scissor layer. Then use the elliptical marquee tool to select an area somewhat to the center of the scissor. Next, use the BURN tool white a light and small brush to shade this area like so.
8. Next, use the Burn tool again on the top left part of the scissor shape to add some shading there. Then use the Dodge tool to lighten the bottom right part of the scissor for an extra gloss. Use light small brushes for these areas.
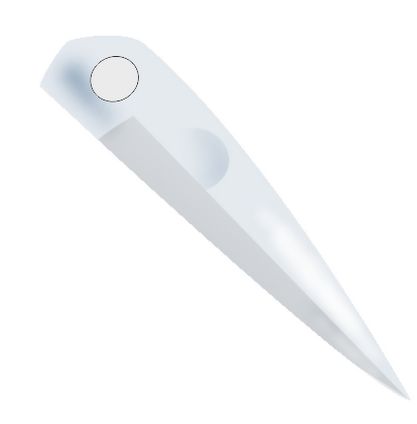
9. Great! Now, use the elliptical shape tool to create the hinge for our scissor. Use the color e5eaef as its fill.
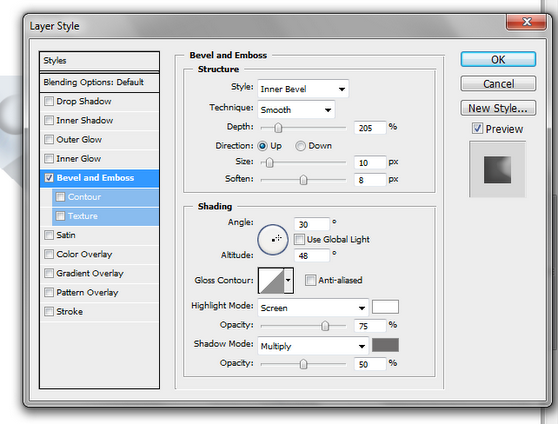
10. Now, go to its blending options and click on Bevel and Emboss. Use these values:
a. Technique: Smooth
b. Depth: 205
c. Size: 10
d. Soften: 8
e. Angle: 30 degrees
f. Shadow Mode: Multiply, Grey, Opacity at 50%
g. Rest use defaults.
11. Now, using the pen tool create the shape below. Make a selection of this shape again like we did the original scissor shape.
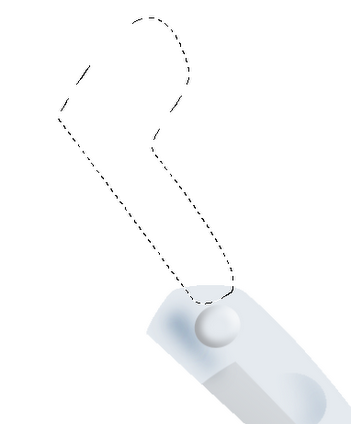
12. Add a black color fill to this and then send the layer to the back.

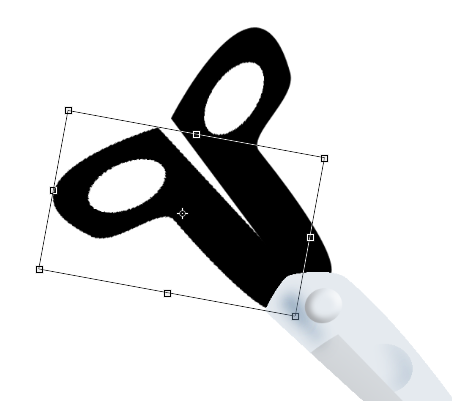
13. Next, use the elliptical marquee tool to make the whole for the scissors. Just inscribe the ellipse shape and then press Backspace.

14. Then, duplicate this layer and rotate it for the other handle.
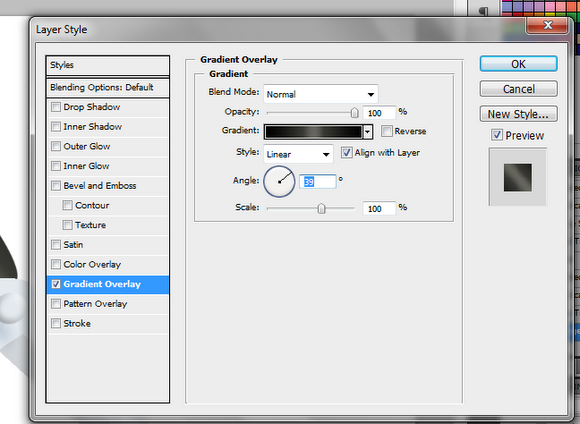
15. Merge both handle layers, and then apply the appropriate gradient color you want for them via the blending options of their layer. Here we just use a black, grey, black gradient at 39 degrees angle.
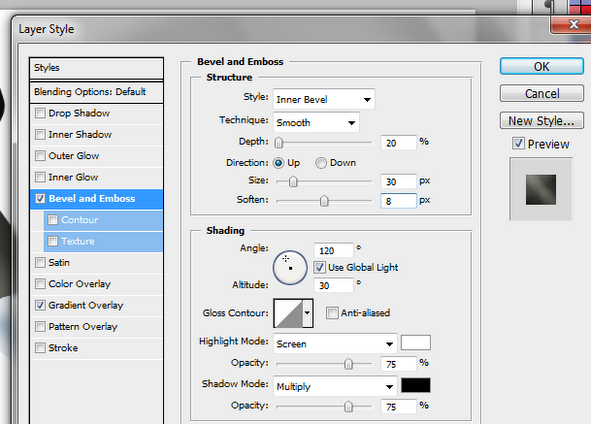
16. Then, tick of the bevel and emboss option and then use the following values:
a. Depth: 20
b. Size: 30
c. Soften: 8
d. Rest use defaults
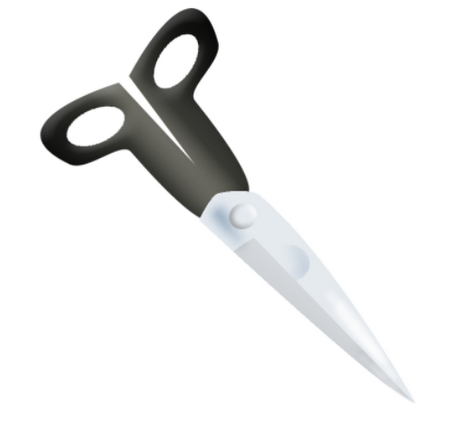
17. Great! We now have a nice scissor Icon!
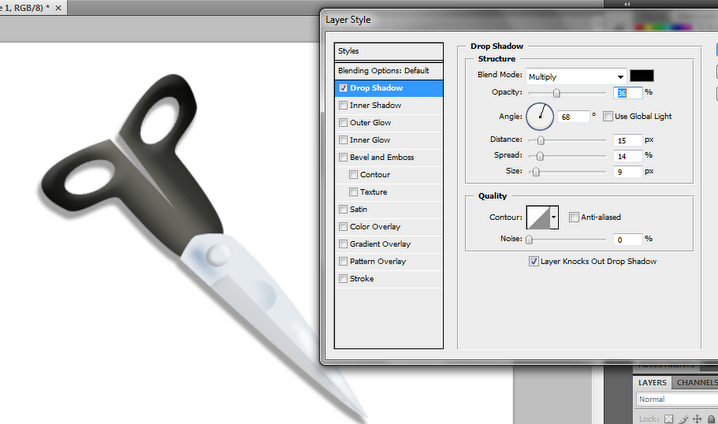
18. To make things more realistic, try merging all your layers and then adding a drop shadow to them using their blending options like so:
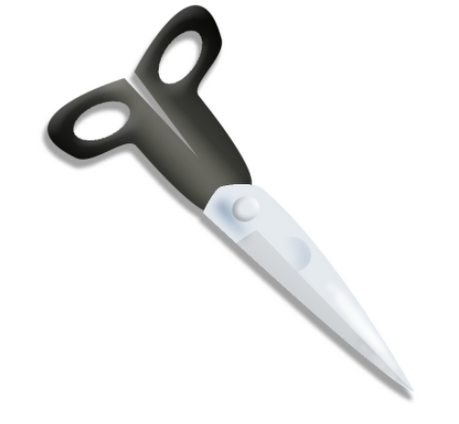
19. Great! Now you know how to create a simple scissor icon using Photoshop.
Related Link: Create your own Paint Palette icon in Photoshop
|
|