 How to flash Replacement PCB (T-X) or Pro-Kit modified PCB
Published by X_Splinter on 2012-01-25
Photos are courtesy of Team Jungle
Introduction
This tutorial will explain in great detail how to flash your Slim Lite-On DVD Drive firmware on your Replacement PCB.
I assume you already have your replacement PCB installed and that you have your Slim Key (see other tutorials to learn how to do it) and that you have made your LT+ firmware with it
Please ensure you PCB switch is set to unlocked mode (by default it is) and that your Xbox 360 has the latest Dashboard before flashing
360-Hq.Com and it's staff DO NOT and WILL NOT take responsibility for users who damage their own equipment in any way, shape or form.
Table Of Contents:
1. Things You Need
2. Flashing the PCB
3. Locking the PCB
1. Things You Need:
1.1. A Slim LiteOn drive
1.2. A Replacement PCB (T-X) or Pro-Kit modified PCB installed
1.3. LT+ firmware with your Key
1.4. Connectivity Kit (Highly recommended)
1.5. JungleFlasher (always use the latest version
2. Flashing the PCB
On JungleFlasher:
2.1. Got to the MTK Flash 32 tab
Note PCB’s are blank when shipped as are the Pro-kit installed chips so Drive properties will NOT show up
2.2. Ensure you are on the correct I/O Port and the Phat is selected then press Intro / Device ID
If you get a pop.up asking you to resend command, then press Yes and turn drive power OFF then ON again quickly.
You should now see this. Including a button (0x00) that was previously blank.
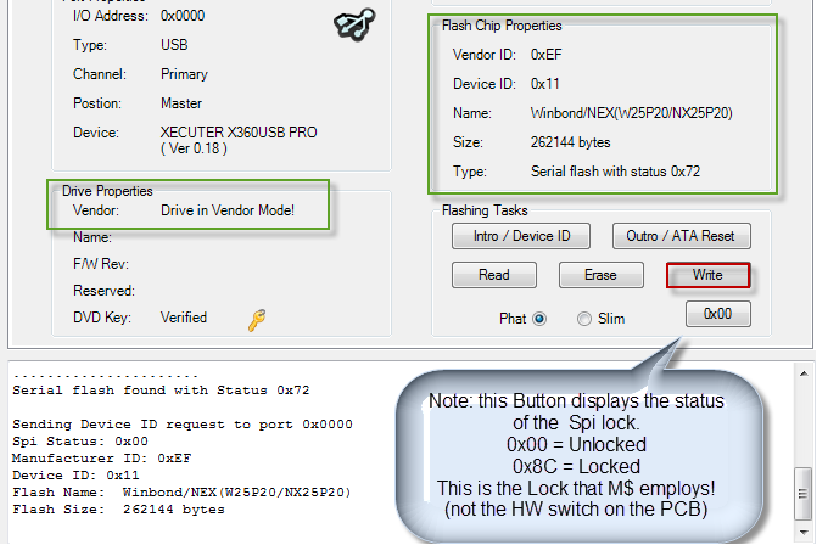
NOTE: If the button is 0x8C is because you havent the read the intrudution – ensure switch on board is set to wp#1 then press the button to unlock the board
2.3. Now press the Write button
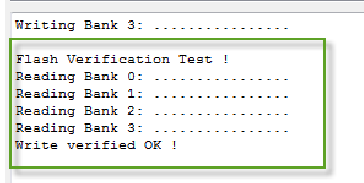
Jungleflasher will proceed to write the firmware that was loaded in target buffer on the FirmwareTool 32 Tab.
Once complete check the log for the Write Verified OK! Message
3. Locking the PCB
Step 3 is very important.
The original drives should all be locked so you need to ensure your replacement is the same!
3.1. Press the Spi-Lock Status Button Currently displaying 0x00
You will see this:
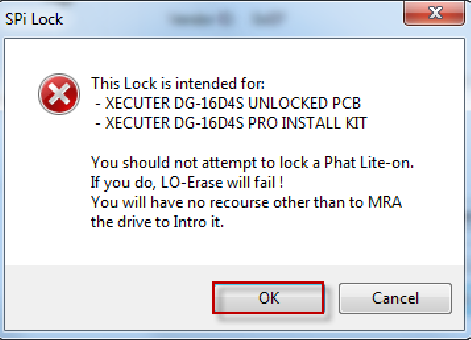
3.2 Click OK to lock the drive
This sends the command to lock the Spi (just as M$ did with 0272 drives on the
13599 dashboard update) you should see this in the log!
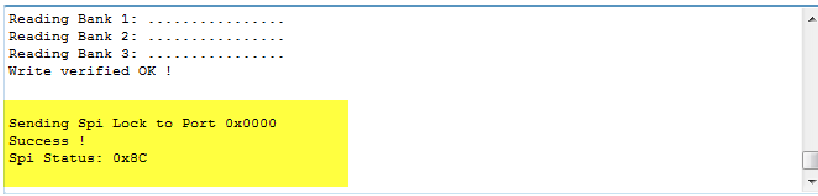
Now note the button text has changed to 0x8C
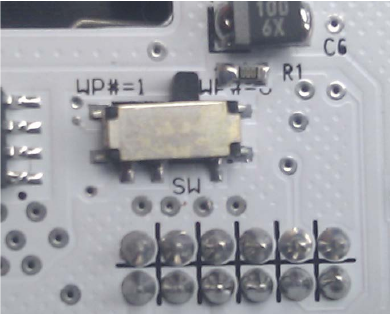
On your PCB
3.3. Now set your Hardware switch on the PCB to WP*=0
On JungleFlasher:
3.4. Now pressing the Spi-Lock button again will fail to unlock it! (that is exactly the way M$ expect an original drive to behave!)
So Ensure you set the switch to WP#=0
NOTE: If you wish to reflash later, set switch to WP#=1 and pressing the 0x8C
button will allow unlocking of the Spi.
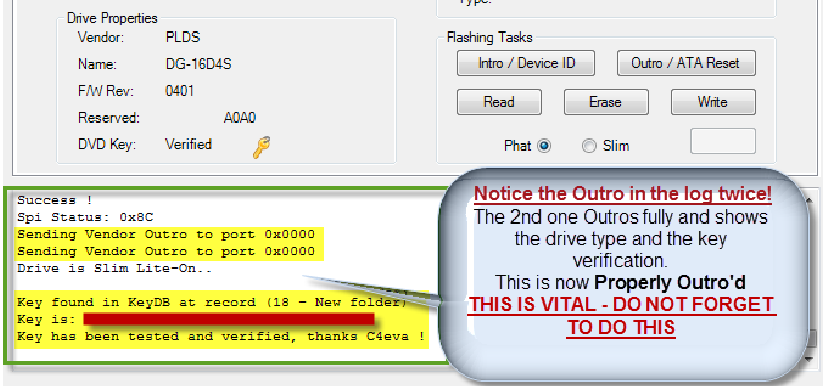
3.5 Press the Outro /ATA Reset Button (This Step is very important)
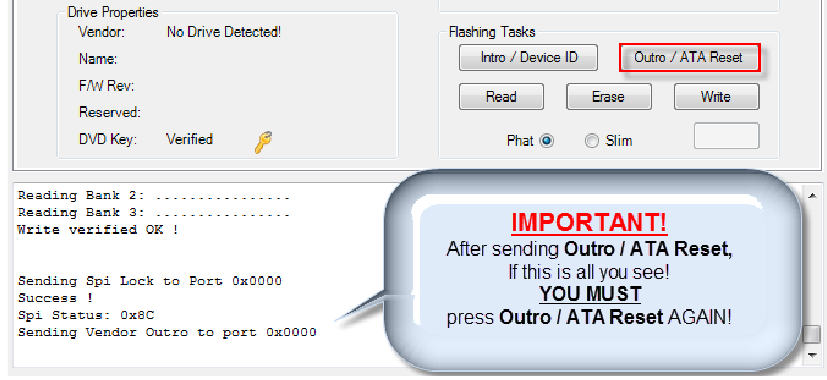
If you do NOT get a Key tested and Verified message in log – Press Outro /ATA
Reset Button AGAIN
3.6. Switch off power to drive, Disconnect and test in your xbox!
You now have your Liteon flashed with LT+
Related Link: 360-HQ Forum
|
|