How to Replace your Broken Rock Band Drumkit Pedal
Published by forahobby on 2009-03-31
Introduction
 This tutorial will explain how to replace your broken rock band drumkit kick pedal with a brand new replacement pedal from MVP USA for as little as $20USD.. MVP USA has manufactured a top quality replacement pedal which boasts a lifetime warranty and I definately suggest you all get one if your pedal has broke or is on its way! This tutorial will explain how to replace your broken rock band drumkit kick pedal with a brand new replacement pedal from MVP USA for as little as $20USD.. MVP USA has manufactured a top quality replacement pedal which boasts a lifetime warranty and I definately suggest you all get one if your pedal has broke or is on its way!
What you need
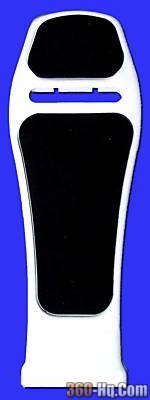
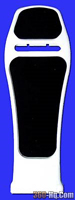
- A broken Rock Band Drumkit Pedal
- Hammer, Pliers, and small Phillips screw driver
- Around $20USD ($35 AUD) cash..
- Oh, and 5 minutes of your time.
How to Identify your Pedal
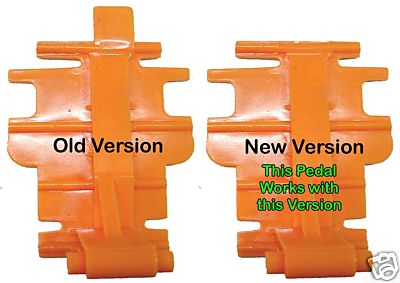
Before you can order your own MVP USA replacement pedal you will first need to know one simple thing. What version rock band pedal do you have.?? Check out the attached picture to identify which pedal you have before you order the wrong one.
It's very easy to tell the difference between a new rock band pedal and an older one, just look at the orange plastic connector.. That's the difference.
Ordering Your Pedal
Once you have identified which type of rock band pedal (new or old) you own you can head off ebay and purchase your replacement from the MVP USA ebay store.
How to Replace your Pedal
1. Remove the pin at the base of the pedal using the supplied nail and a hammer to drive out the pin. This may require some force. The large head of the pin is on the left side so drive it out from the right side to the left side.
2. Press the pedal down to compress the spring and slide the pedal to free the orange plastic hook from the underside of the pedal base.
3. Unscrew the 4 small Phillips screws that hold the orange plastic piece to the bottom of the pedal and discard the screws.
4. Remove the magnet and bumpers from the bottom of the pedal. pliers may be required to remove the bumpers.
5. Install the magnet and the bumpers on the back of the newpedal. Turn the bumpers while pressing down until the flange on the bympers is flush with the back of the pedal.
6. Install the orange plastic retainer on the back of the pedal using the new screws and hey key (allen) wrench provided.
7. Hook the orange plastic piece onto the base and install spring.
8. Reinstall the pin in the base of the pedal.
That's it.. Now go and test out your new Rock Band Drumkit Pedal.. woot!.
Now that's value for your dollar.. Happy drumming and see you all online for a jam.. :)
Related Link: Rock Band Replacement Drumkit Pedal from MVP USA
|
|