 12 Gauge Shotgun D-Pad for Xbox 360
Published by pornflakes on 2012-01-06
Today I will be showing you how to replace your boring d-pad with the brass from a 12 Gauge shotgun shell.
Disclaimer
360-Hq.Com, it's staff and I DO NOT and WILL NOT take responsibility for users who damage their own equipment in any way, shape or form. We are in no way responsible for injury or damage caused from preforming this mod. If you have no spent rounds this mod does involve tampering with live shotgun rounds and if you don't listen or screw it up its not our fault. We cannot stress this enough! Education purposes only.
Now that is out of the way lets get started.
Things you will need.- dremel
- various sanding and grinding bits
- shotgun shells
- duct tape
- hot glue/epoxy
- drill
- patience
Step 1: Bang for your buck
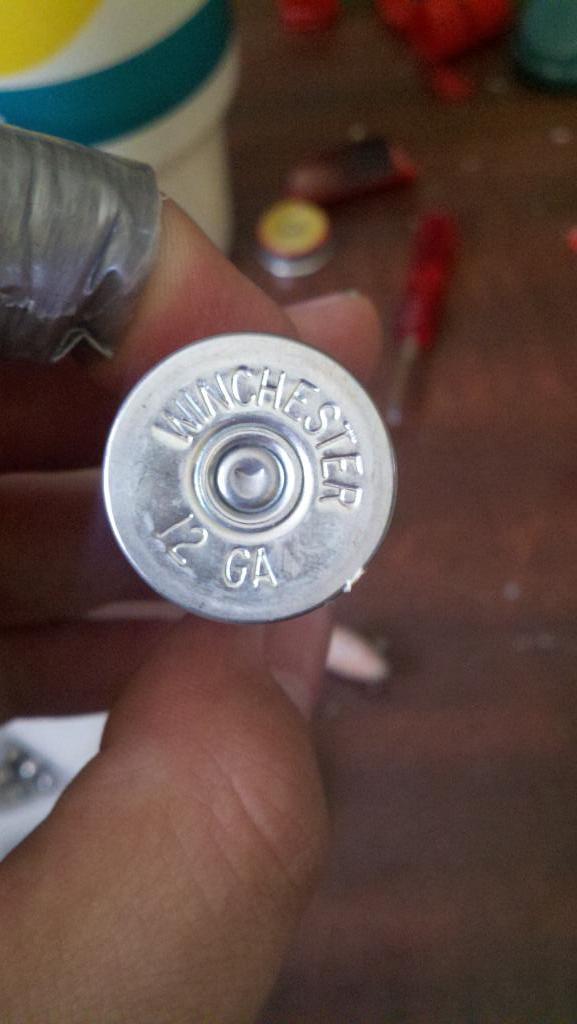
You have two options here, buy brand new 12 ga shells like i did pictured below or go to a local range and hunt down some spent shells (skip to part 7)
Step 2: Unloading
Take your knife and pry open the crimped end of the shell. (part that looks like a butthole.) and dump out the shot. Save these as they are most likely lead and can be melted down for other things.
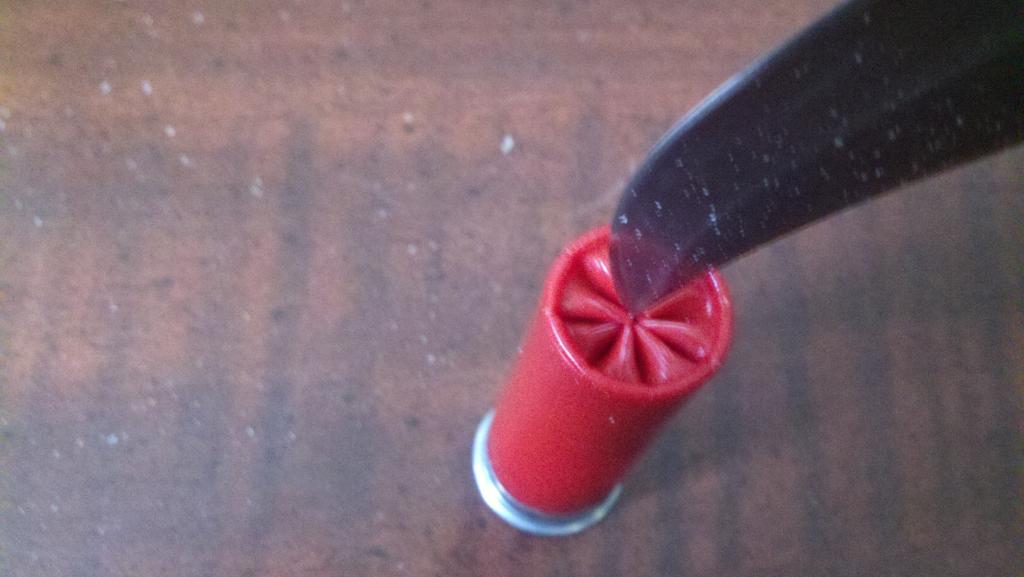
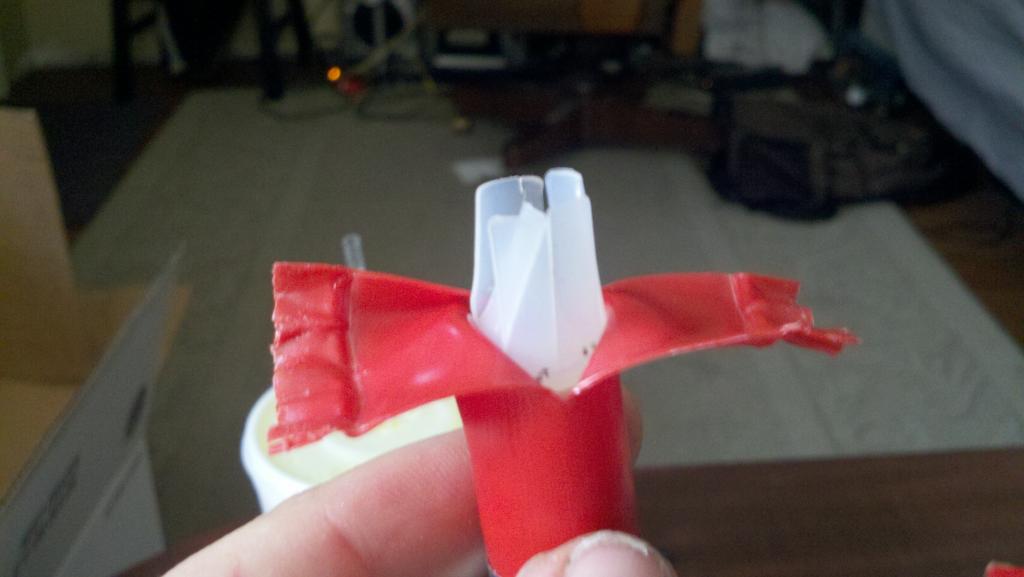
Step 3: Split 'er open
Take your sharp shank and split the shell from the top to the middle of the round. peel it like a bananna.
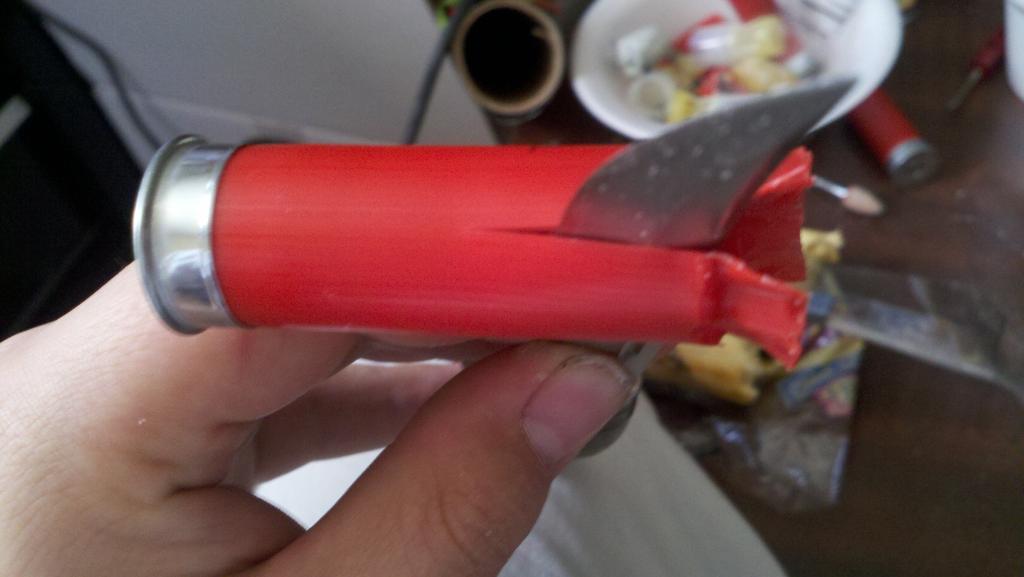
Step 4: Evisceration
Get your pliers out and rip out the white separation cartridge. A quick twist will do.
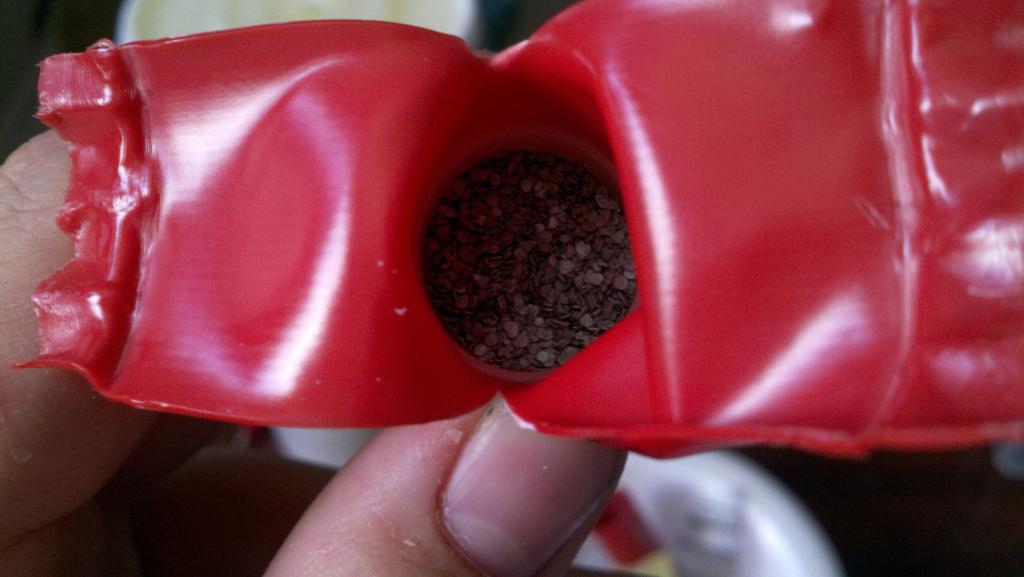
Step 5: Release the powder
Tap the shell out on a bowl for the gun powder to come out. (Dispose of properly. bury it, flush it, burn it. just don't snort it.)
Step 6: Kill the primer
Now get you a healthy square of duct tape and throw a ball bearing or a split shot in the center and tape it on the primer of your shell, throw it in the air over some concrete and get the hell away from it. ONLY DO THIS STEP AFTER ALL SHOT AND POWDER ARE REMOVED! other wise you'll be holier than the damn pope.
Or you could just cycle her through a 12 gauge, if your into that kind of thing.
*sidenote* sometimes the pop of the primer (which sounds like a 22 going off) will blow the back of the primer out. You dont want that, keep trying shells till one stays intact (no hole in the back)
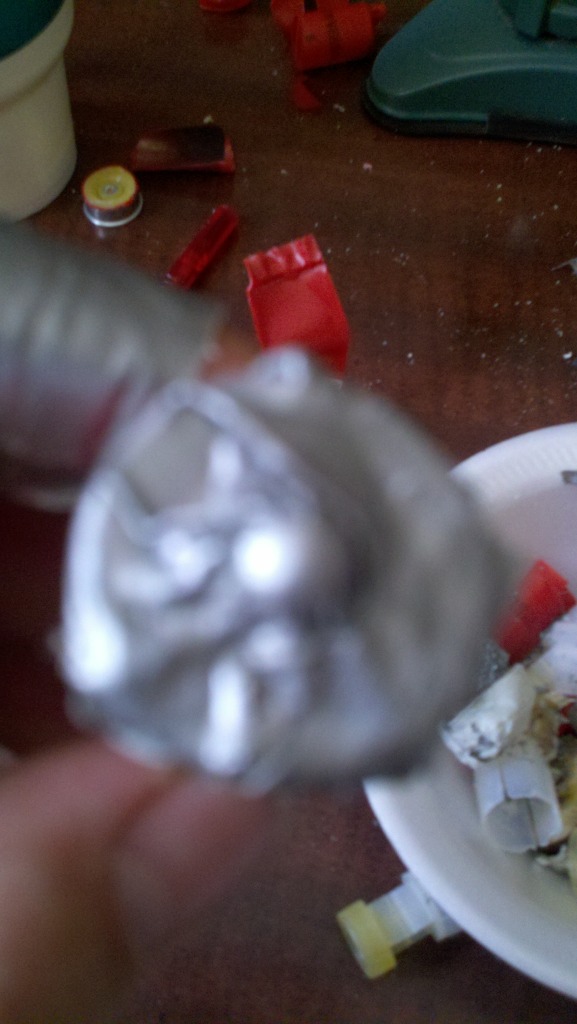
Step 7: Slimfast
Now "shell"y is lookin a little thick for 2012 so she needs to be cut down a notch. Do so with your sharp shank.

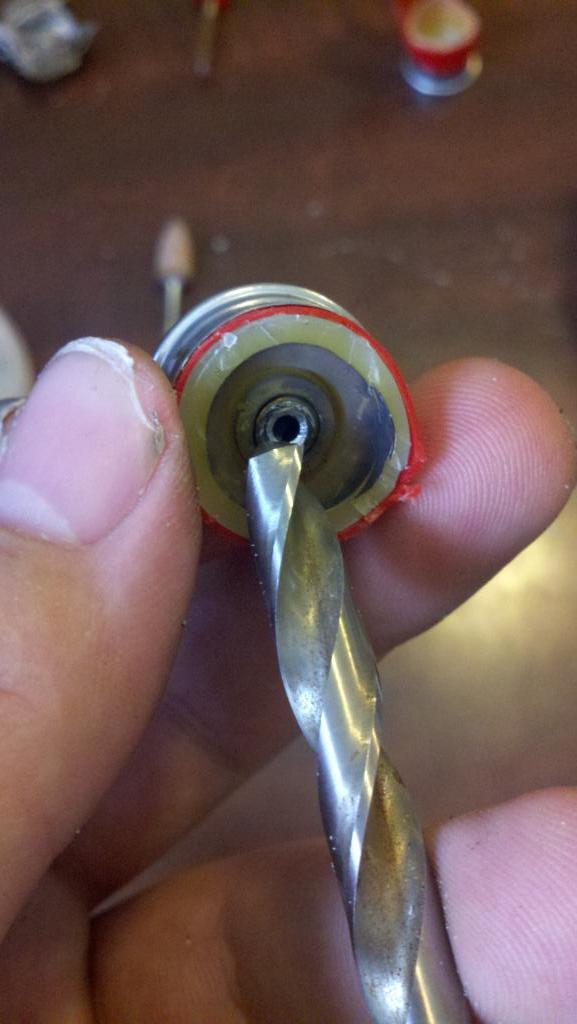
Step 8: Opening the hole
Take your drill with a similar sized bit as your primer pin and drill until it falls out.
Step 9: Feeling hollow?
Take your sanding bit on your dremel and proceed to hollow out the plastic in the bottom of the shell. when it gets thin and hot enough you can just pull it out with pliers.
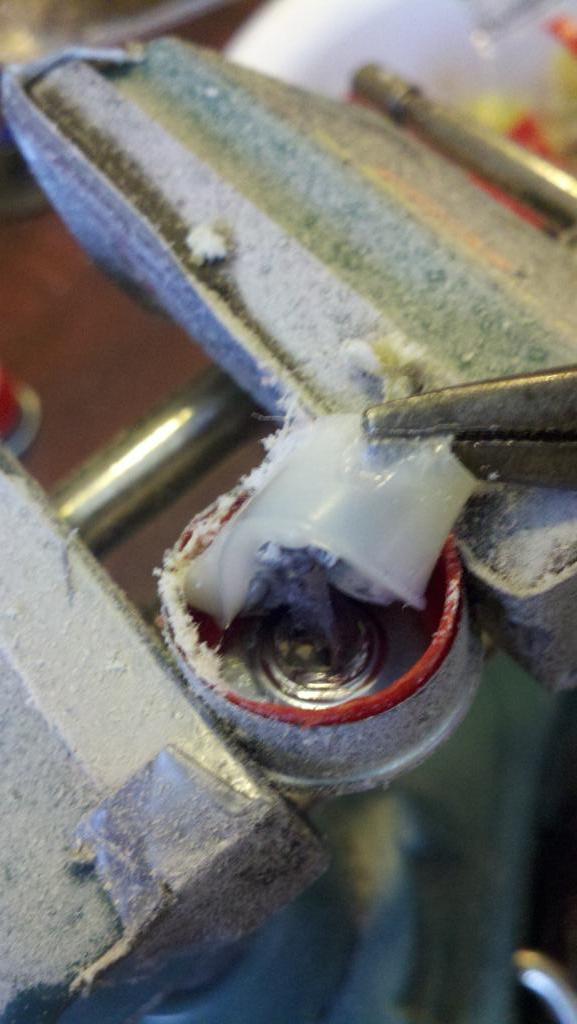
Step 10: Gettin sticky
Take your super glue(gel) and glue your primer back in its hole.
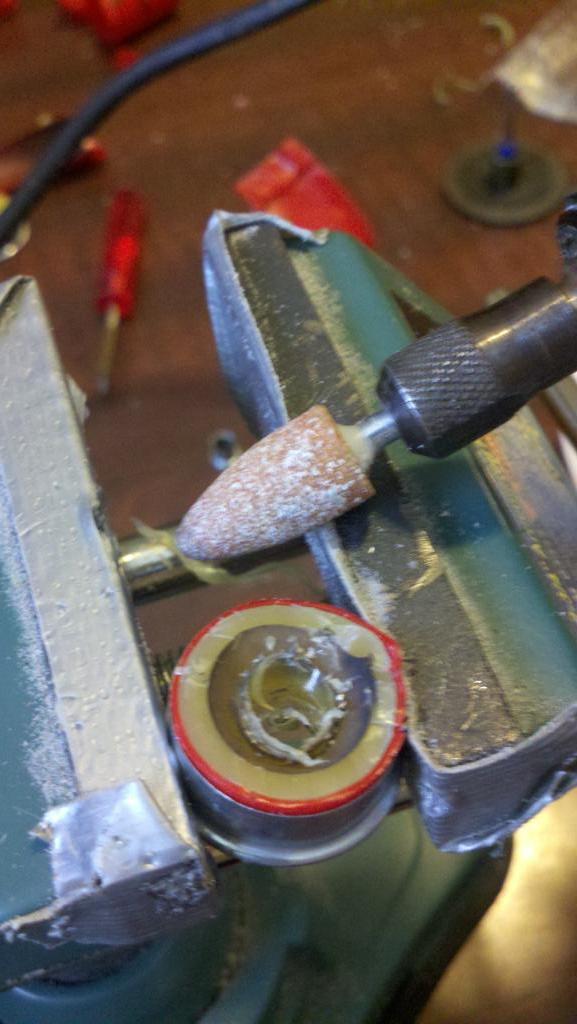
Step 11: Get to grindin
Take your grinding bit and grind the primer about a 1/4 inch from flush of the inside of the casing. Shown above
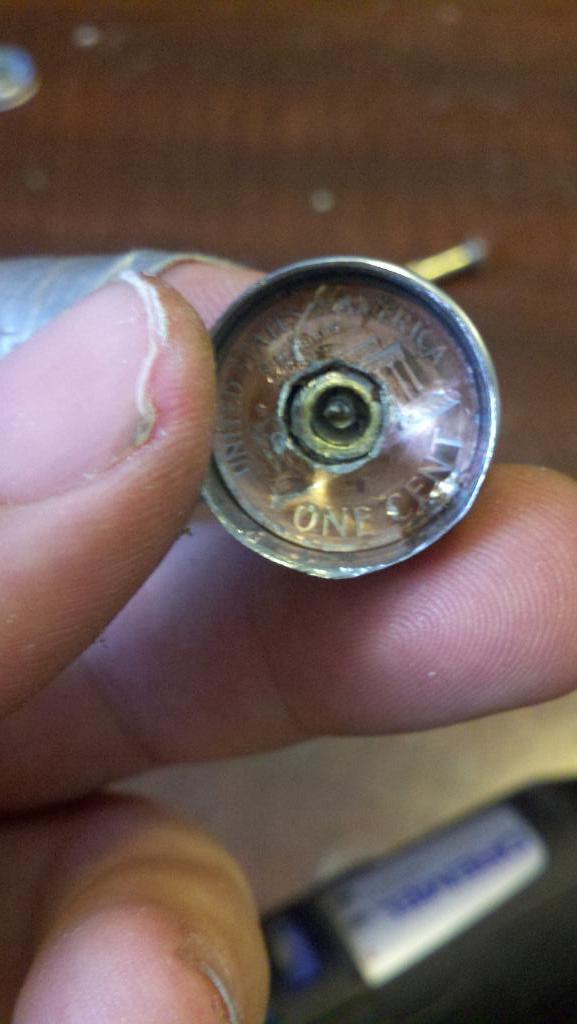
Step 12: Coining the phrase
Get you a regular penny and the drill bit we used earlier drill out the center hole in a vice and hot/super glue the coin over your primer.
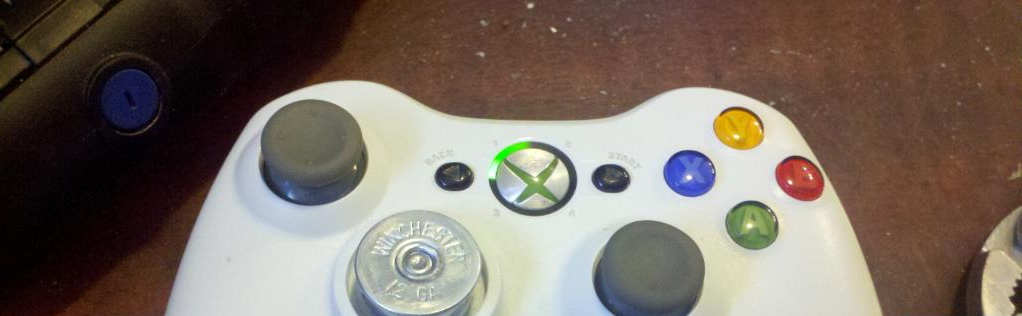
Step 13: Nice Pad bro
Take your stock dpad apart and grind down the arrows flush to the rest.. you also need to reduce the circumference with your dpad will fit in the shell
Step 14: Glue for you
Finally hot/super/epoxy glue the shell over the ground down D-Pad, make sure shes straight! and enjoy the new feel. If you made it this far with all your digits then you done good man.
Hope you guys enjoy, this is completely written by me and these pics are too. I didn't see this on the forums so i decided it would be nice. Note: I also posted this on se7ensins under the same username.
Related Link: http://forums.360-hq.com
|
|